This guide covers the client workflow: create a client, request access with an invite, and track the request until the client is done.
Overview
Clients are the businesses or people you request account access from. Invites are the one-time access requests you send to a specific client.
Use clients when you already know who should receive the request. Use access pages when you want one reusable page that can create clients for you.
Accessing Clients
Go to Dashboard -> Clients.
Creating a Client
- Go to Clients.
- Click Create Client.
- Add the client's name, company, and email address.
- Add a website if you want AgencyAccess to pull the favicon as the profile image.
- Choose Client or Prospect.
- Choose the client's language.
- Click Create.
You can also create a client inside the invite modal. For a first request, creating the client first is usually clearer.

Client Types
Client is for active clients you are working with.
Prospect is for potential clients you are auditing or onboarding. Prospect requests are limited to read-only access where the platform supports access levels.
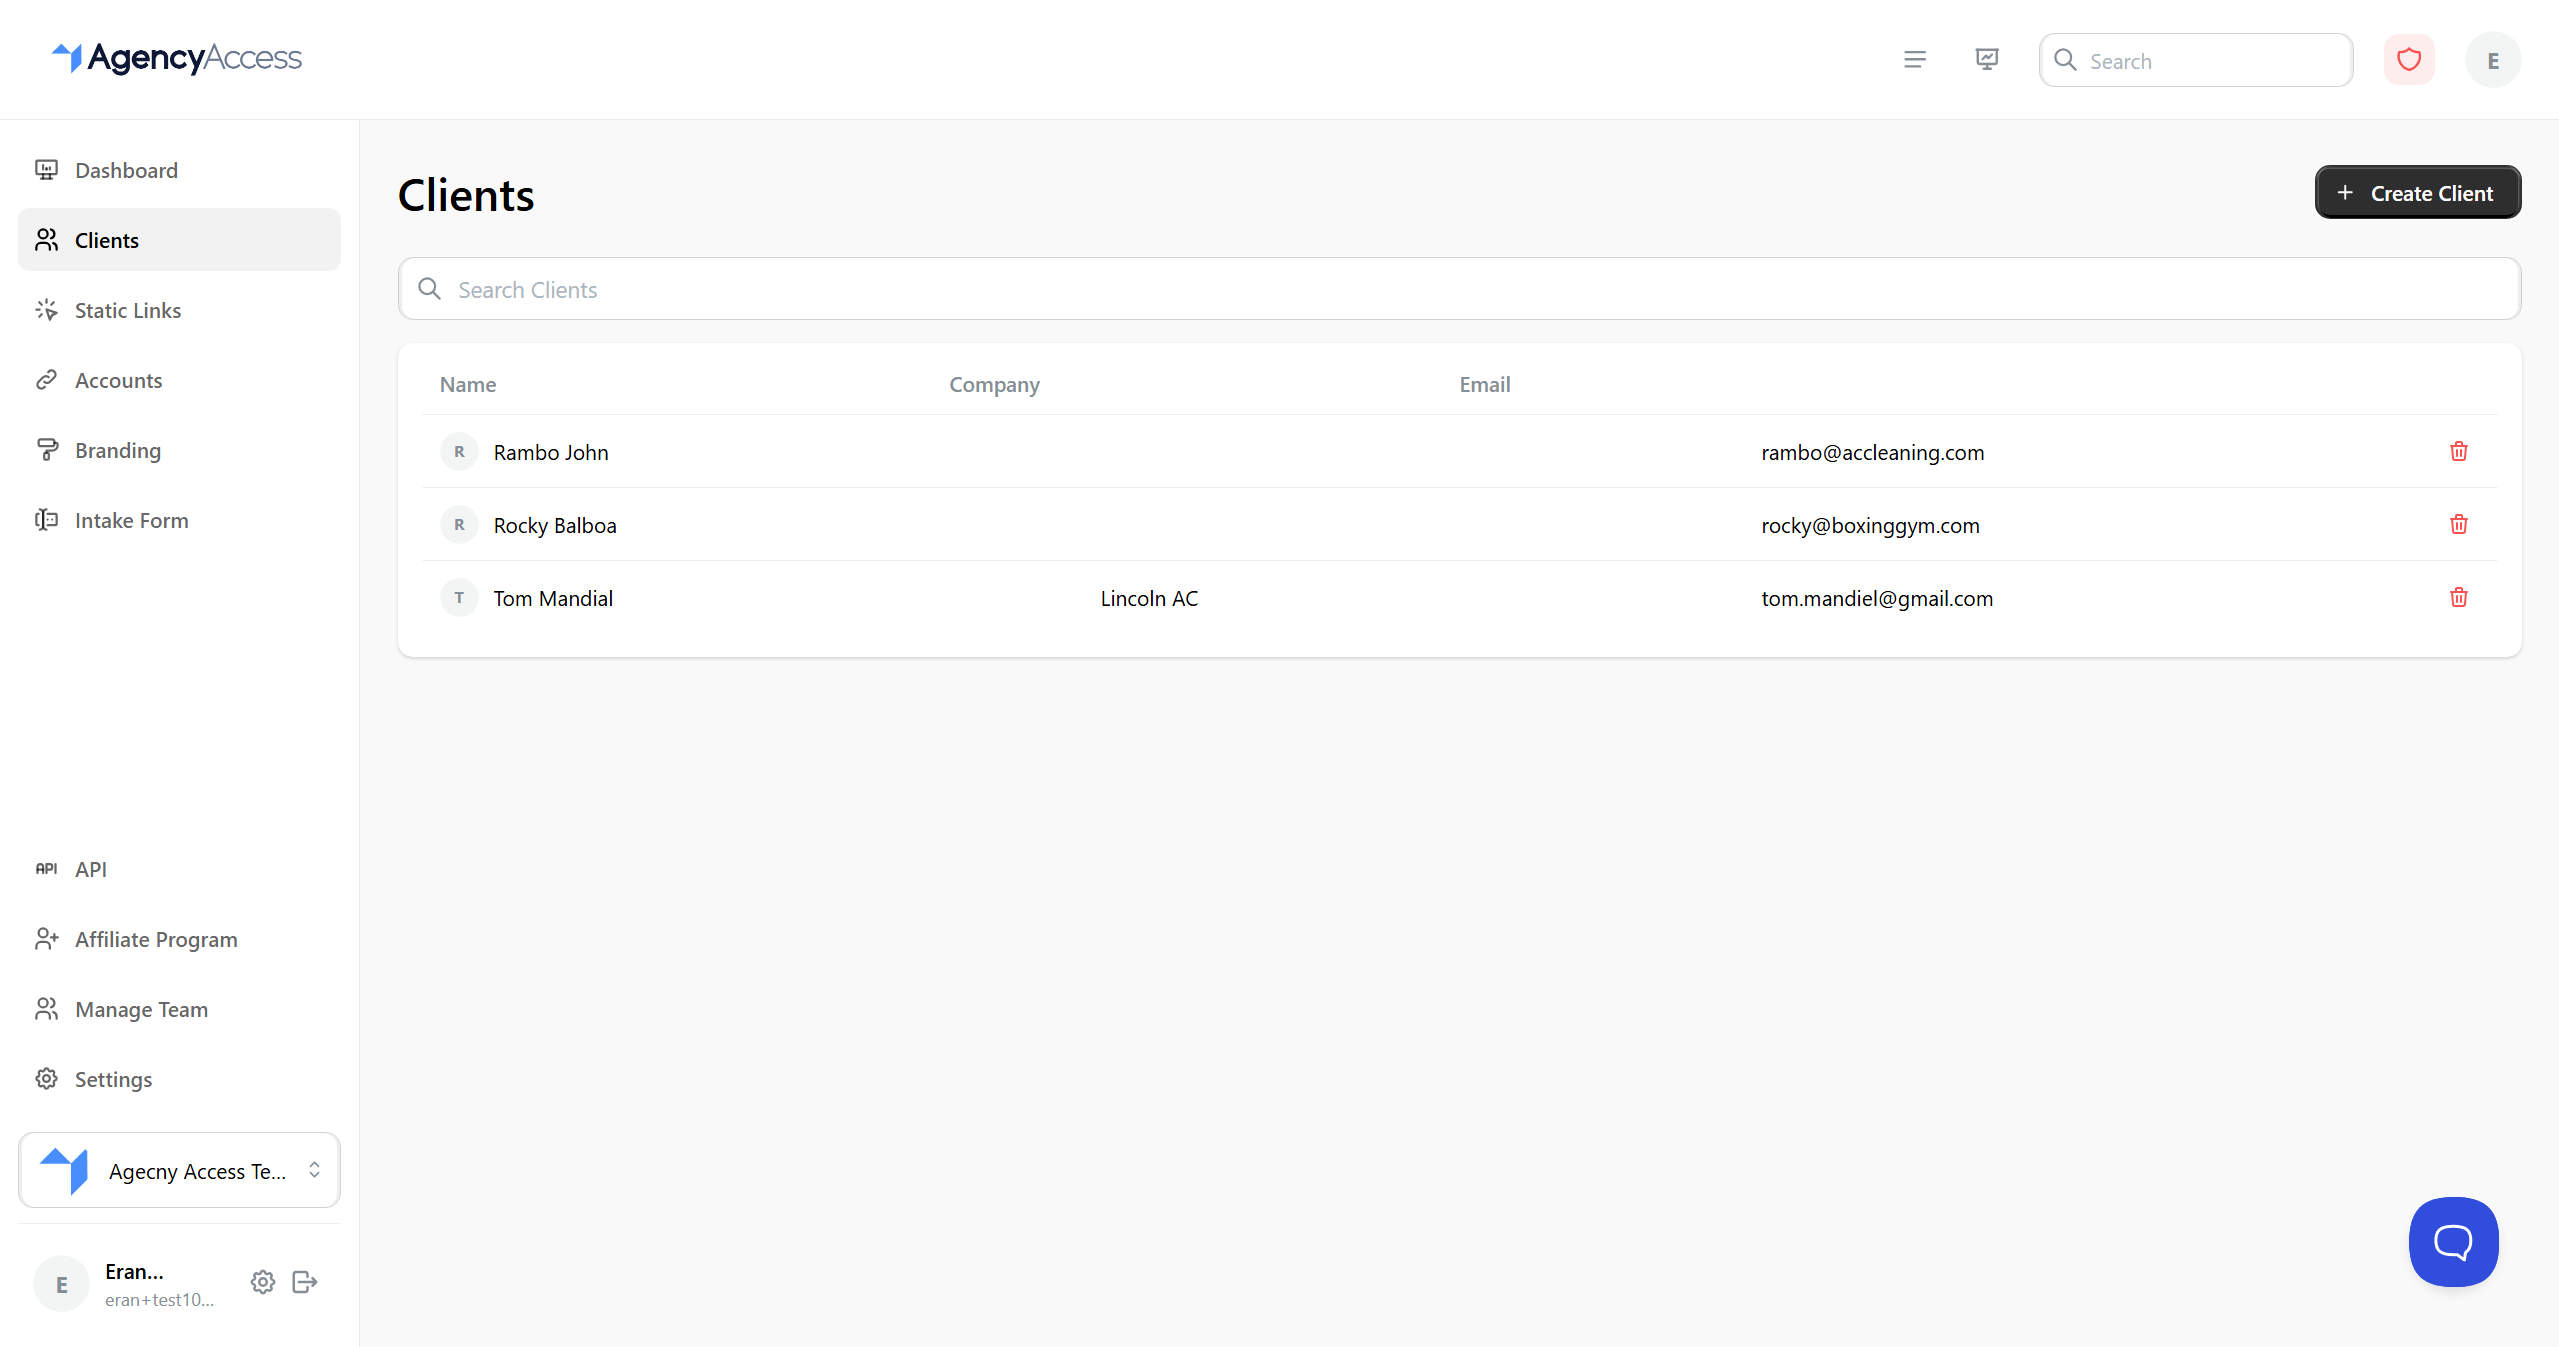
Managing Clients
The client list shows the client's name, company or email, profile image, and latest invite context. Use search to find clients by name, company, email, or ID.
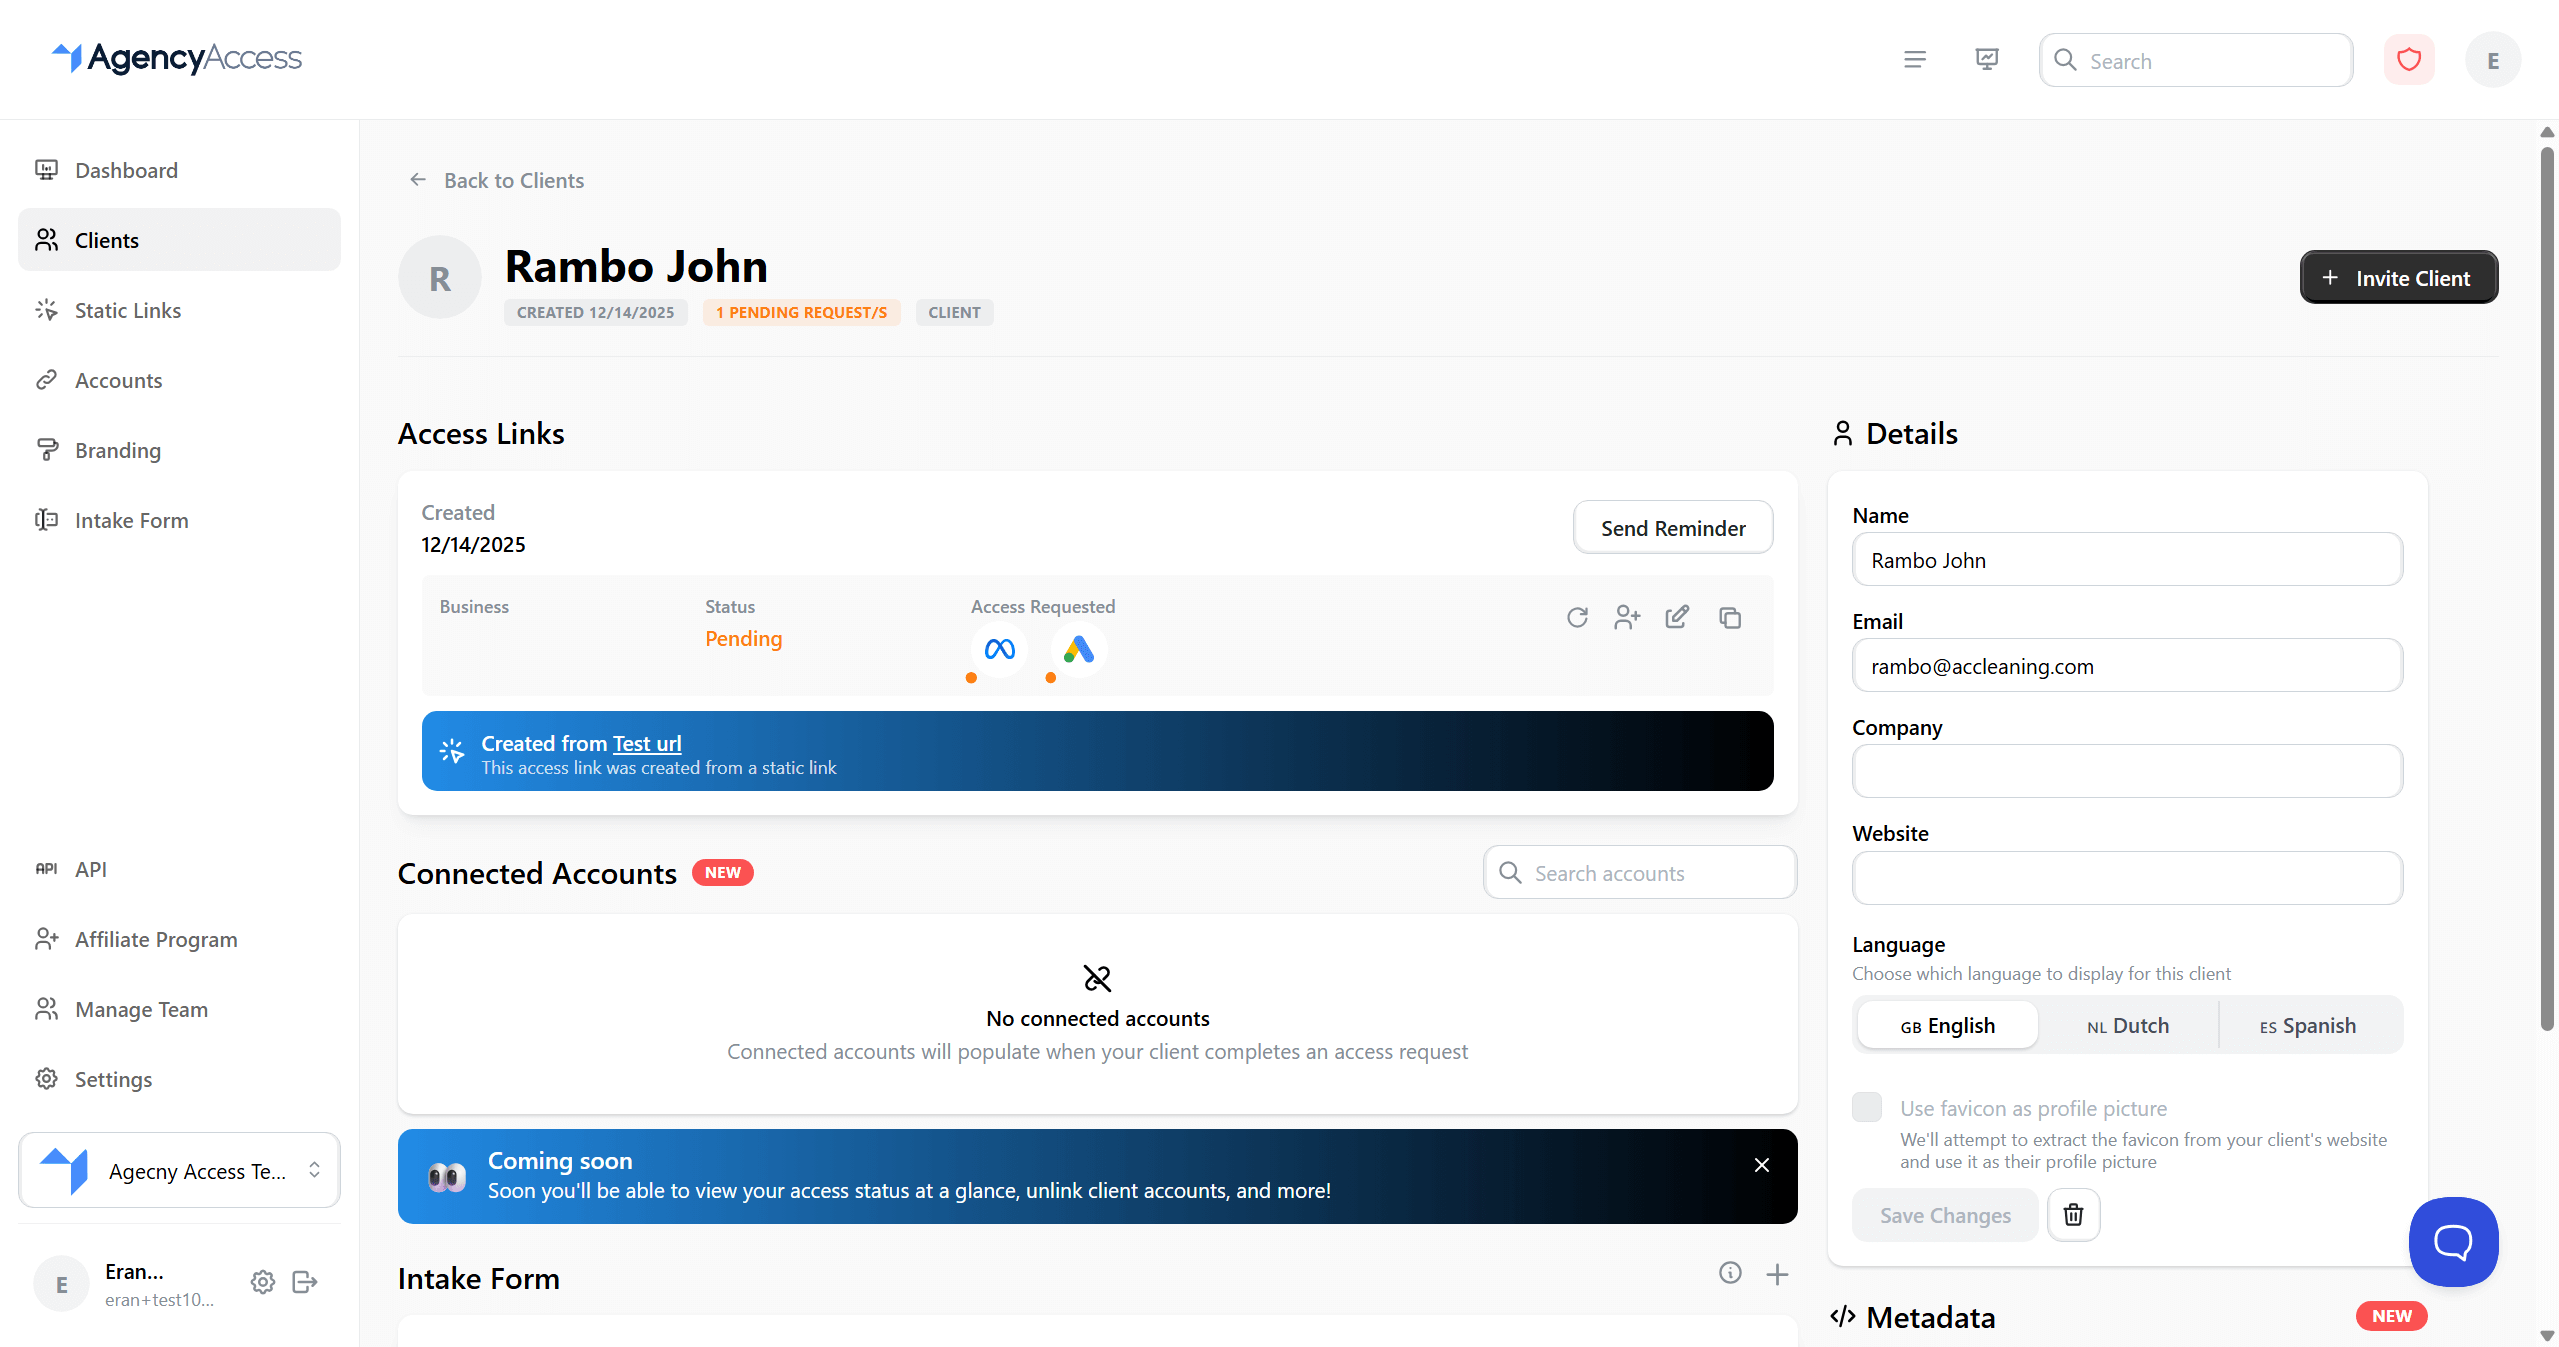
Open a client to see:
- Client details.
- Connected accounts granted by that client.
- Invite history.
- Intake form responses.
- Client metadata.
You can edit client details from the client profile. Deleting a client also removes the client's invite history and related data, so only delete records you no longer need.
Creating Client Invites
- Go to Dashboard.
- Click Create Invite.
- Select an existing client or create a new one.
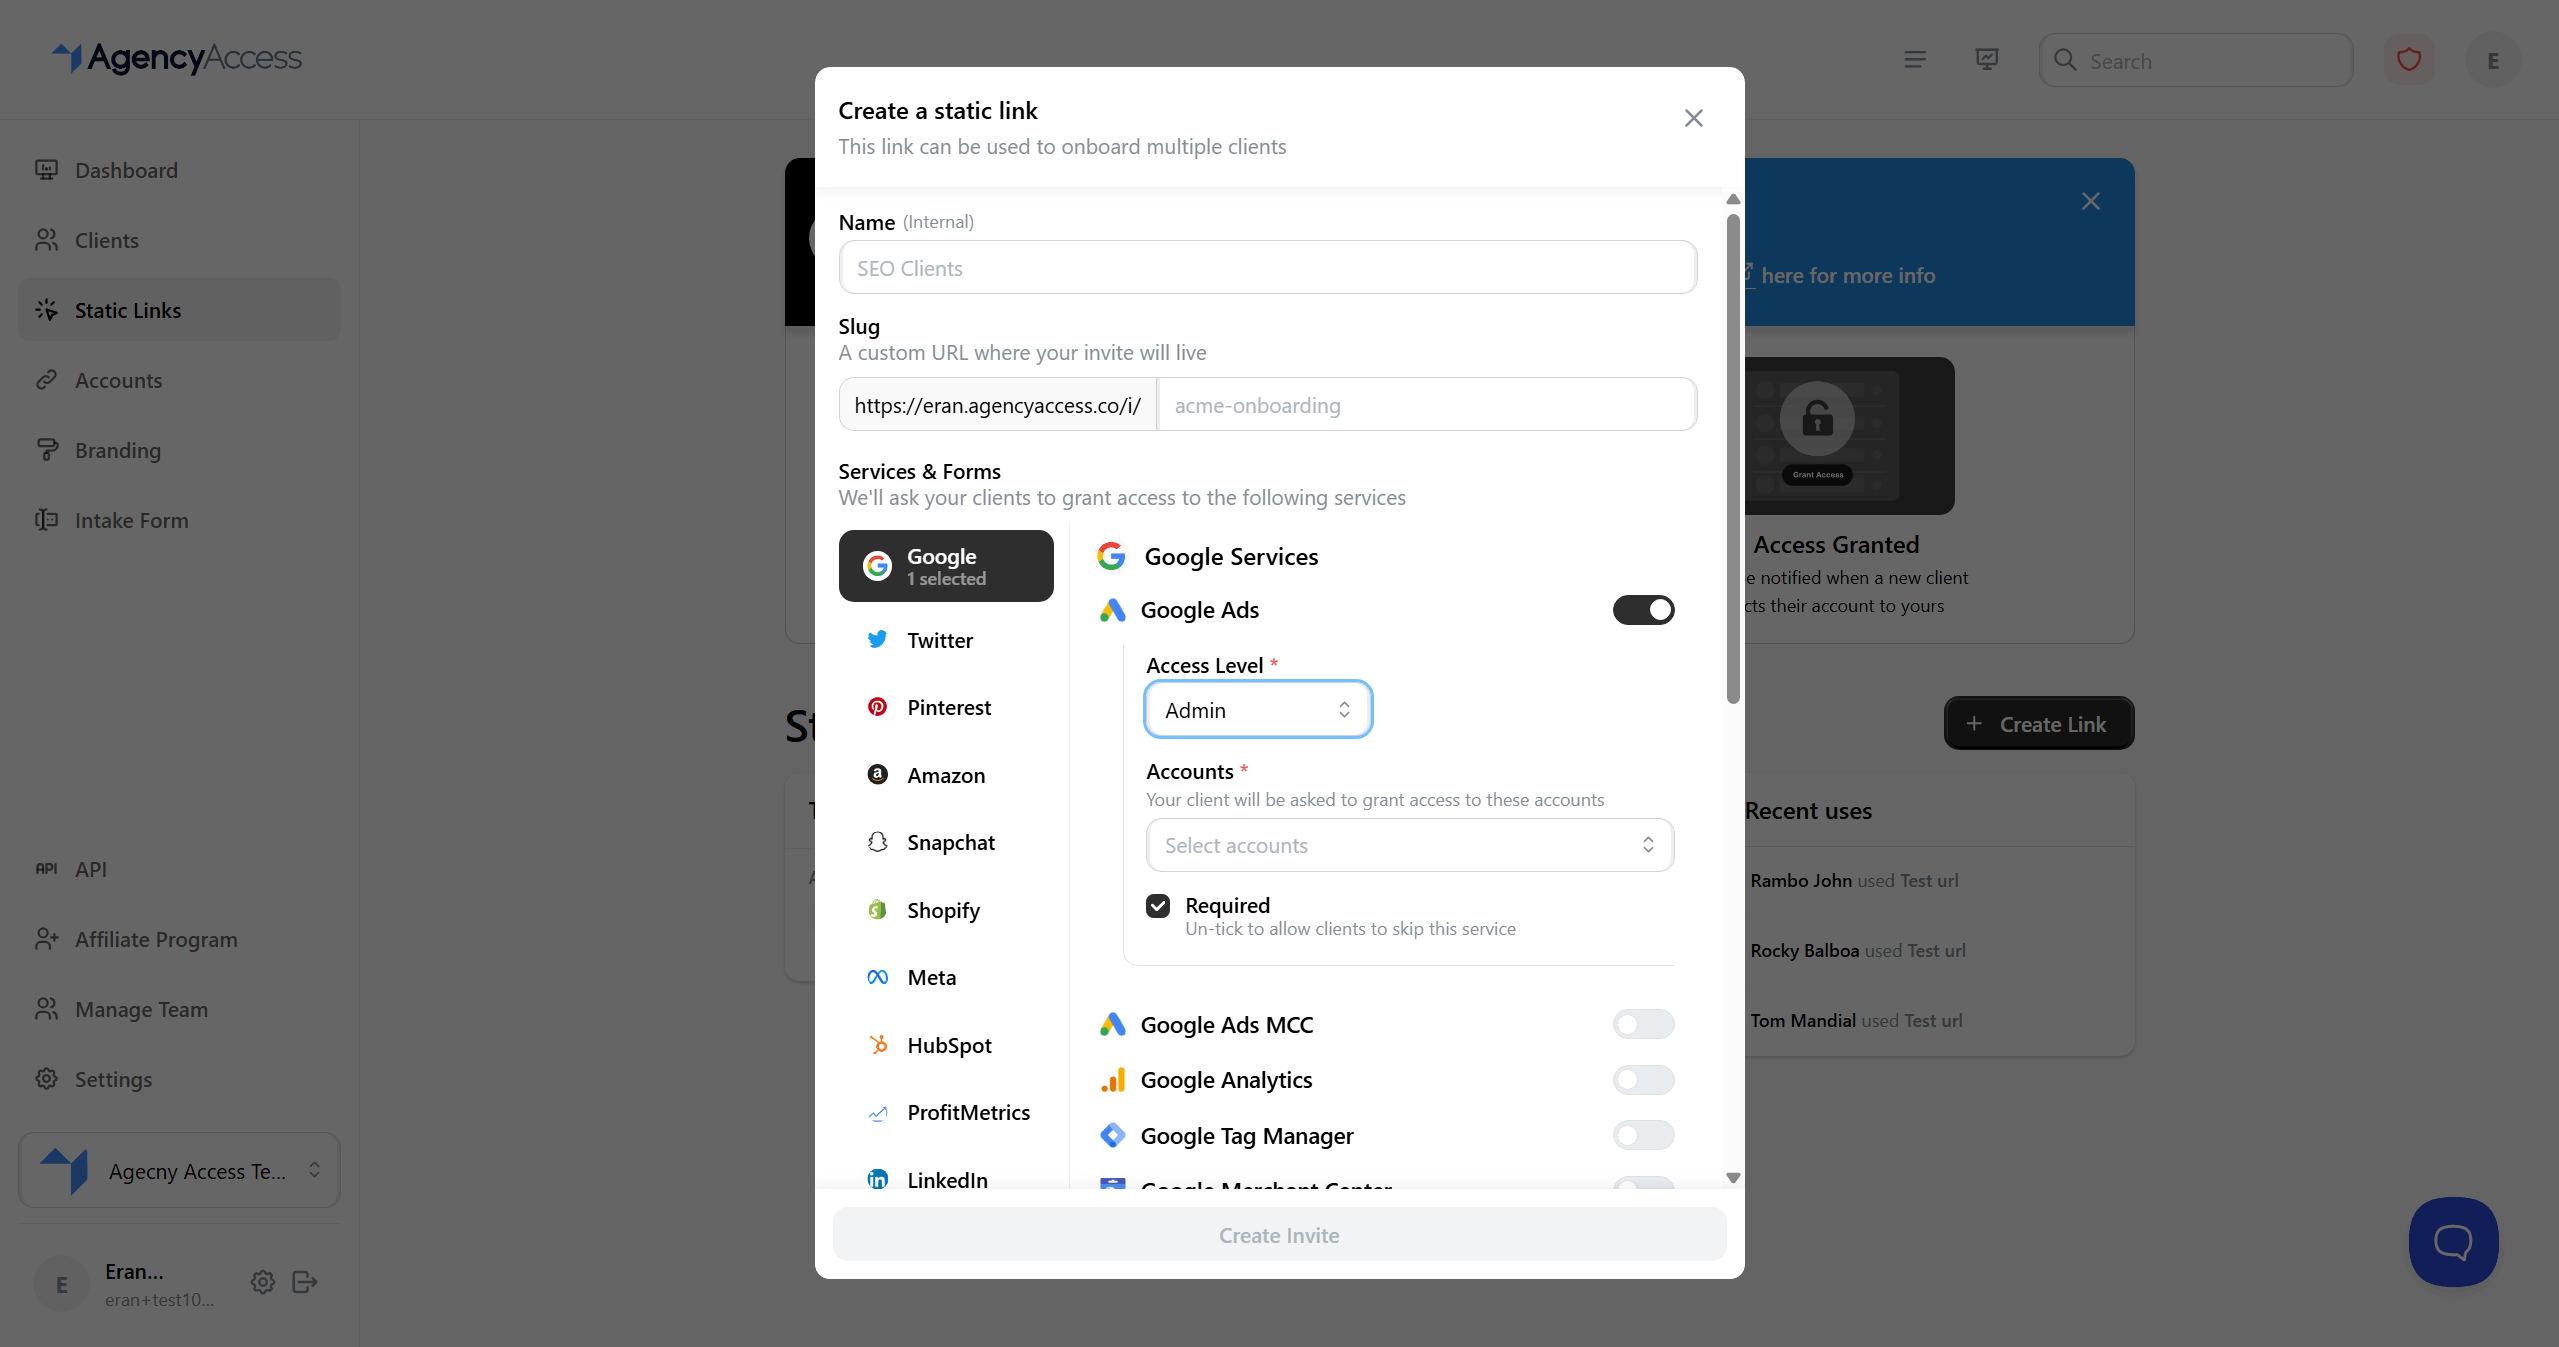
- On Choose accounts, select the services you need.
- Choose the connected agency account that should receive access.
- Choose access levels where the platform asks for one.
- Turn on Intake Form if the client should answer intake questions.
- Use Preview your link to review the access form, intake form, and email.
- Add an optional thank you message or redirect.
- Review the summary.
- Leave Send email notification checked if AgencyAccess should email the invite.
- Click Send.
The success screen gives you the invite URL. You can copy it and send it yourself if you did not use email notification.
Invite Best Practices
Request only the services you need right now. Smaller requests are easier for clients to complete and easier to troubleshoot.
Use the lowest access level that works for the job. For prospects, AgencyAccess limits requests to read-only levels where possible.
Add a thank you message or redirect when the client needs a next step after granting access.
Managing Invites
Invites appear on the dashboard and on the client's profile.
Each invite shows:
- Client information.
- Requested services.
- Service status: pending, granted, or skipped.
- Intake form status, if requested.
- Creation date.
- Reminder and copy actions.
- Token access, if token retention was enabled.
An invite is complete when all required services are granted and the intake form is complete, if one was requested.
Editing an Invite
You can edit the requested accounts on an existing invite.
- Find the invite on the dashboard or client profile.
- Click the edit action.
- Add or remove services, adjust access levels, or change the connected agency account.
- Check Send email update if the client should be notified.
- Save the changes.
Changing already-granted services may require the client to grant access again. Thank you messages and redirects are set when the invite is created.
Reminders and CC Recipients
Use Send Reminder when the client has not completed the request. Reminders are rate-limited, so the button may be disabled if one was sent recently.
Use Add CC when someone else should receive the invite email. Do not add the original client as a CC recipient; use reminders for that.
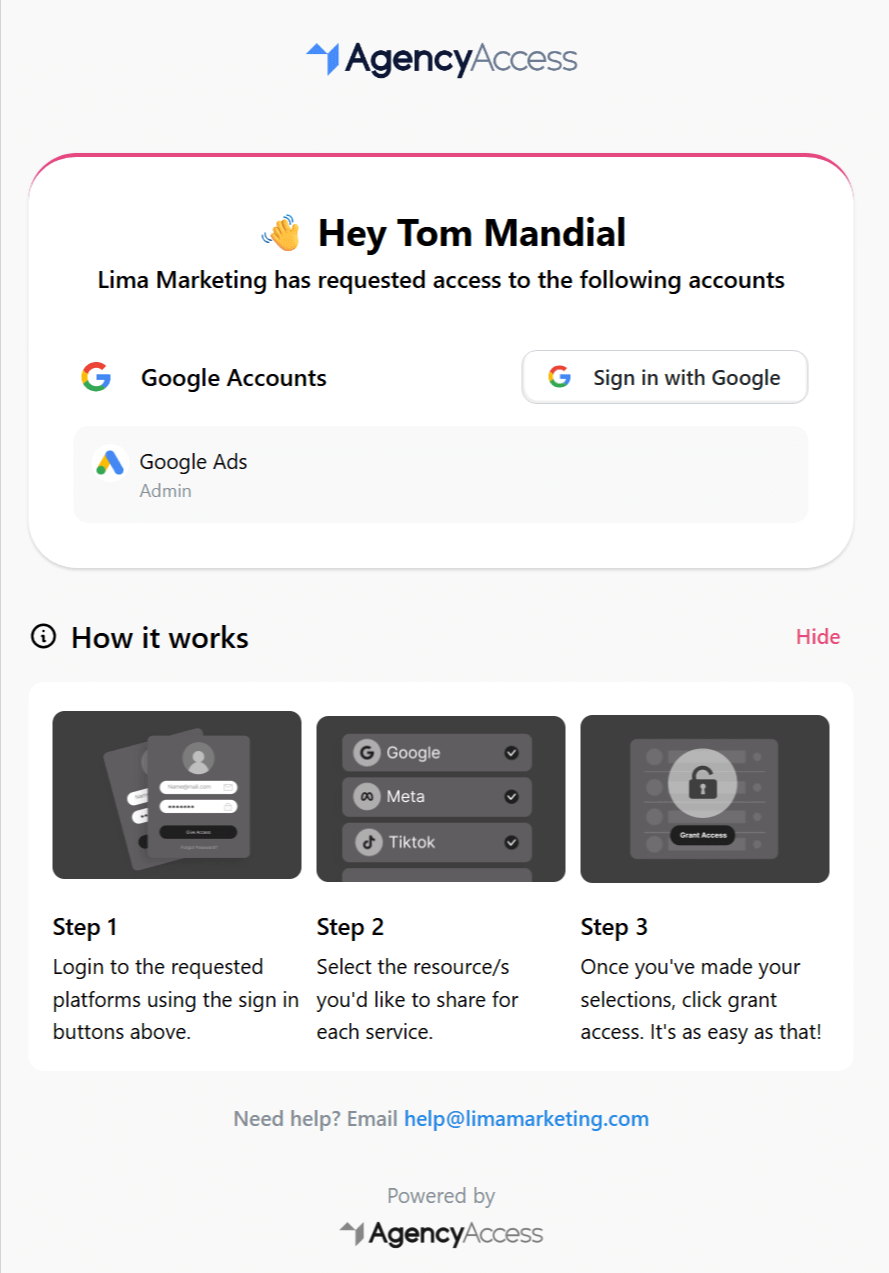
Client Experience
When email notification is enabled, the client receives an email with the invite link. They open the branded invite page, sign in to the relevant platforms, grant the requested access, complete the intake form if requested, and then see your thank you page or redirect.
Intake Forms with Invites
If your intake form is enabled and has questions, the invite builder shows an Intake Form toggle in the account-selection step. Turn it on when the client should answer your intake questions during the same flow.
Responses appear on the client profile after completion.
Access Pages
Access pages are reusable onboarding pages. They create a client when someone uses the page, so they are better for website CTAs, sales emails, and repeatable onboarding flows.
See Access Pages.
Troubleshooting
I cannot create an invite
Make sure the client exists and at least one relevant agency account is connected.
The client did not receive the email
Check the email address, ask the client to check spam, or copy the invite URL and send it manually.
Access still shows as pending
The client may have skipped a service, signed in with the wrong account, or lacked permission to grant access. Open the invite details to see which service is pending.
The client cannot grant access
Ask them to confirm they have admin, owner, partner, or manager permissions for the platform they are trying to grant.