This guide explains how to create and manage intake forms that collect information from clients during the access grant process.
Overview
Intake forms allow you to gather structured information from clients before or after they grant account access. This information is automatically saved to the client's profile for easy reference.

Use Cases:
- Collect business information
- Gather account details
- Request preferences and goals
- Capture billing information
- Collect compliance data
Accessing Intake Forms
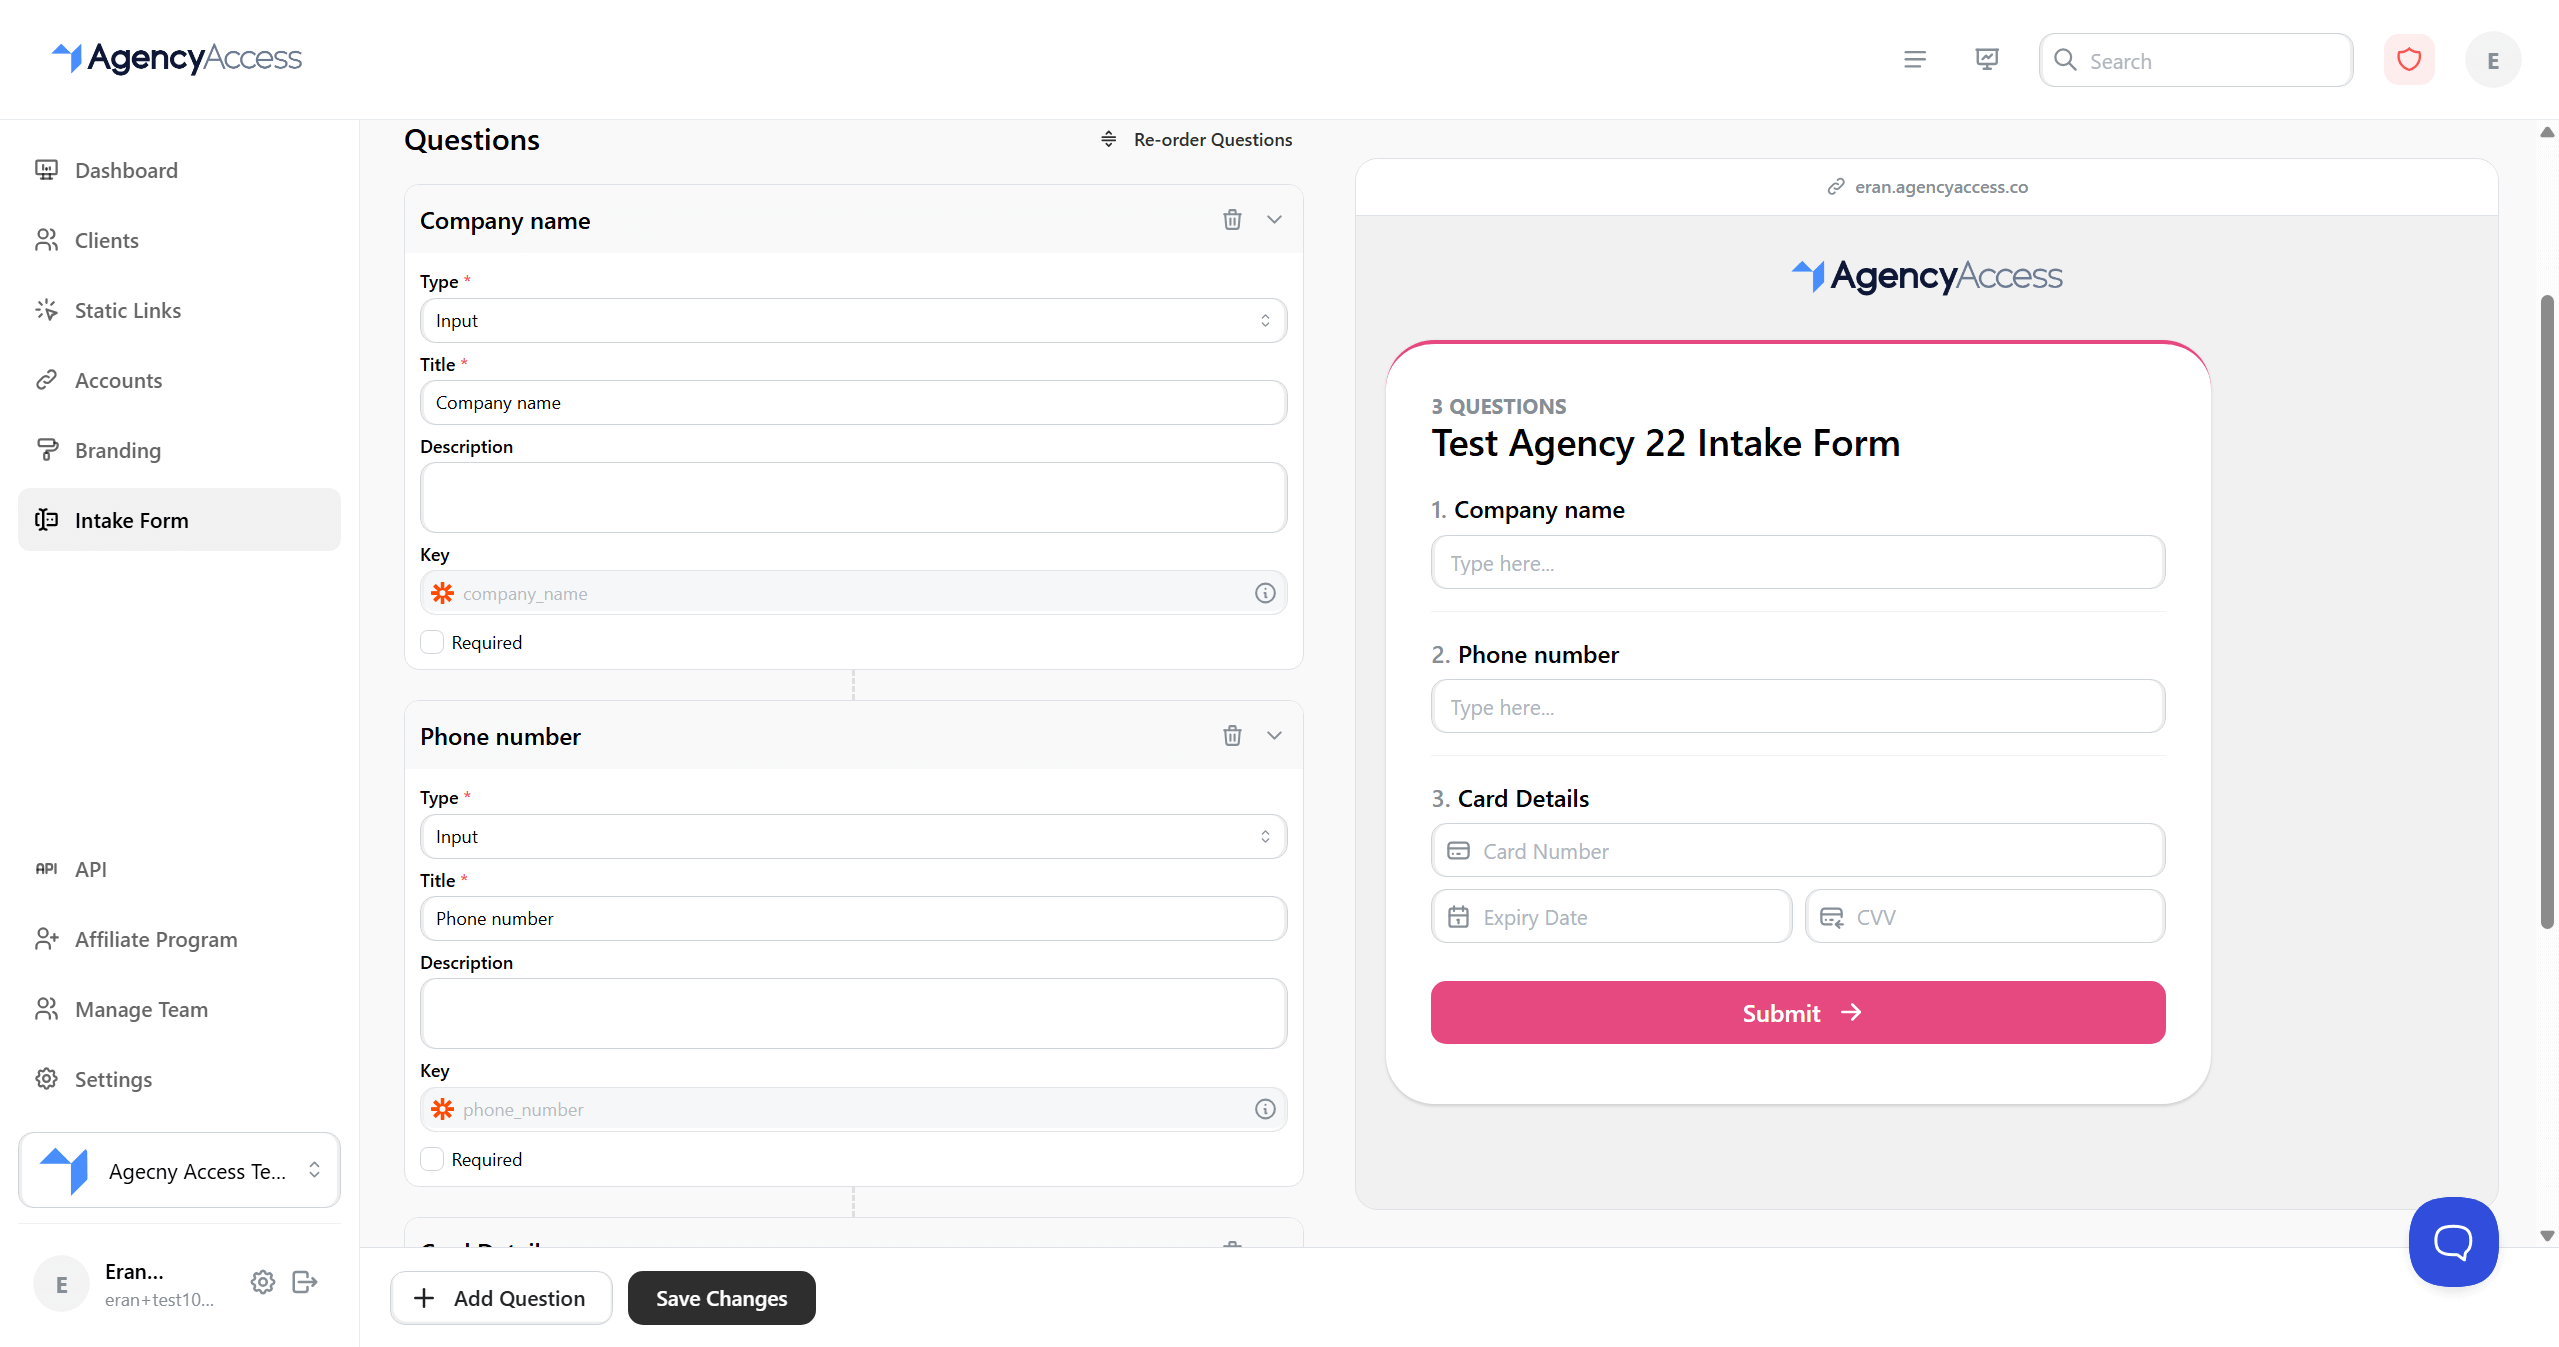
Navigate to Dashboard → Intake Form from the main navigation menu.
Enabling Intake Forms
Before creating questions, you must enable intake forms:
- Go to the Intake Form page
- Find the "Settings" section
- Toggle "Enabled" to ON
- Forms are now active (but you still need to add questions)
Important: Intake forms must be enabled AND have at least one question before they can be included in access links.
Question Types
AgencyAccess supports several question types:
Input
Single-line text input for short answers.
Best For:
- Names
- Email addresses
- Phone numbers
- Account IDs
- Short text responses
Example Questions:
- "What is your company name?"
- "Enter your Google Ads account ID"
- "What is your phone number?"
Textbox
Multi-line text area for longer responses.
Best For:
- Comments
- Descriptions
- Notes
- Detailed explanations
Example Questions:
- "Describe your marketing goals"
- "Any additional information we should know?"
- "Special requirements or preferences"
Option
Single-choice selection from predefined options.
Best For:
- Yes/No questions
- Category selection
- Priority levels
- Status selection
Example Questions:
- "What is your primary industry?" (with options: Retail, E-commerce, SaaS, etc.)
- "What is your budget range?" (with options: $0-1k, $1k-5k, etc.)
Multi-select
Multiple-choice selection from predefined options.
Best For:
- Selecting multiple items
- Choosing services
- Selecting platforms
- Tag selection
Example Questions:
- "Which platforms are you currently using?" (select all that apply)
- "What services are you interested in?" (select multiple)
Card Details
Secure payment card information collection.
Best For:
- Payment processing
- Billing setup
- Subscription management
Note: Card details are handled securely and may require additional setup.
Creating Questions
Method 1: Pre-made Questions
AgencyAccess provides pre-made questions for common use cases:
- Click "Add Question" button
- In the popover, expand "Pre-made Questions"
- Browse available questions:
- Chamber Of Commerce Number
- VAT Reg Number
- Company name
- Name
- Address
- Invoice email
- Date of Birth
- Phone number
- Visitor address
- Other / remarks
- Card Details
- Click on a question to add it
- Customize as needed (see Editing Questions below)
Method 2: Custom Questions
Create your own questions from scratch:
- Click "Add Question" button
- In the popover, click "Create your own" under Custom
- A new question appears with default settings
- Configure the question (see Question Configuration below)
Question Configuration
Each question can be configured with:
Basic Settings
Title (Required):
- The question text shown to clients
- Keep it clear and concise
- Use question format (ending with "?")
Description (Optional):
- Additional context or instructions
- Helps clients understand what to provide
- Appears below the question title
Type (Required):
- Select from: Input, Textbox, Option, Multi-select, Card Details
- Determines how clients answer
Options (For Option and Multi-select Types)
If using Option or Multi-select:
- Enter option values in the options list
- Click "Add Option" to add more choices
- Remove options by clicking the trash icon (first option cannot be removed)
- Options appear as selectable choices to clients
Required Field
Mark questions as required:
- Toggle "Required" checkbox
- Clients must answer required questions before submitting
- Required questions are marked with an asterisk ()
Question Key
Each question has an automatic key based on the title:
- Format:
question_title_lowercase_with_underscores - Used for API access and Zapier integration
- Example: "Company Name" becomes
company_name - Keys are shown in a read-only field with info tooltip
Reordering Questions
Change the order questions appear to clients:
- Click "Re-order Questions" button
- Drag questions up or down using the grip icon
- Questions reorder in real-time
- Click "Stop re-ordering" when done
- Save changes
Note: Question order affects how clients see the form. Put most important questions first.
Editing Questions
Modify existing questions:
- Find the question in the list
- Click to expand the question editor
- Modify any settings:
- Change title or description
- Change question type
- Update options
- Toggle required status
- Changes save automatically (with debounce)
- Preview updates in real-time
Deleting Questions
Remove questions you no longer need:
- Expand the question
- Click the trash icon
- Question is removed immediately
- Save changes to persist deletion
Warning: Deleting a question removes it from all future forms. Existing client responses are preserved.
Preview
The Intake Form page includes a live preview:
- Preview appears on the right side
- Shows how the form will look to clients
- Updates automatically as you make changes
- Includes your branding settings
Preview Features:
- Shows all questions in order
- Displays question types correctly
- Includes required field indicators
- Matches your branding
Saving Your Form
Save all form settings:
- Make all desired changes
- Review in the preview panel
- Click "Save Changes" button (bottom of page)
- Wait for confirmation
- Form is now active
Important:
- Form must be enabled AND have questions to work
- Always click "Save Changes" after making modifications
- Verify form in preview before using
Using Intake Forms in Access Links
Once your intake form is set up:
- When creating an access link, check "Include Intake Form"
- Client will see the form after granting access (or before, depending on configuration)
- Form responses are saved to the client's profile
- You can view responses on the client detail page
Note: You cannot include an intake form in a link if:
- Intake forms are disabled
- No questions are configured
- Form hasn't been saved
Viewing Form Responses
Access client responses:
- Go to Clients page
- Click on a client
- Navigate to "Intake Form" section
- View all responses:
- Question titles
- Client answers
- Response date
Form Best Practices
- Start Simple: Begin with essential questions, add more later
- Be Clear: Use clear, concise question titles
- Provide Context: Use descriptions to explain what you need
- Logical Order: Put most important questions first
- Required Fields: Only mark truly required questions
- Test First: Preview and test form before sending to clients
- Regular Updates: Review and update forms based on client feedback
Question Examples
Business Information
- Input: "What is your company's legal name?"
- Input: "What is your company's tax ID?"
- Textbox: "Describe your business model"
Account Details
- Input: "What is your Google Ads account ID?"
- Input: "What is your Facebook Business Manager ID?"
- Multi-select: "Which platforms are you currently advertising on?"
Goals and Preferences
- Option: "What is your primary marketing goal?" (Options: Brand Awareness, Lead Generation, Sales, Other)
- Textbox: "What are your key performance indicators (KPIs)?"
- Option: "What is your monthly advertising budget?" (Options: $0-1k, $1k-5k, $5k-10k, $10k+)
Compliance
- Input: "Chamber Of Commerce Number"
- Input: "VAT Registration Number"
- Textbox: "Any compliance requirements we should know about?"
Troubleshooting
Form Not Appearing
Issue: Intake form doesn't show in access links
Solutions:
- Verify form is enabled
- Check that at least one question exists
- Ensure "Include Intake Form" is checked when creating link
- Save form settings
Questions Not Saving
Issue: Changes to questions don't persist
Solutions:
- Wait for auto-save (5 seconds)
- Manually click "Save Changes"
- Check for error messages
- Refresh page and try again
Client Can't Submit Form
Issue: Client reports form won't submit
Solutions:
- Verify all required fields are filled
- Check form is enabled
- Ensure client has granted access (if form appears after access)
- Contact support if issue persists
Responses Not Appearing
Issue: Can't see client responses
Solutions:
- Check client detail page
- Verify client completed the form
- Refresh the page
- Check if responses are in a different section
Integration with Zapier
Intake form responses are available in Zapier integrations:
- Access via
client.intakeForm.{question_key} - Question keys are auto-generated from titles
- Use in automation workflows
- Example:
client.intakeForm.company_name
See the question key field for the exact path to use.
Next Steps
After setting up intake forms:
- Test with a sample access link
- Review client responses
- Refine questions based on feedback
- Set up Zapier automation for responses
For more information, see: