This guide explains how to control the client-facing experience for invites and access pages.
Overview
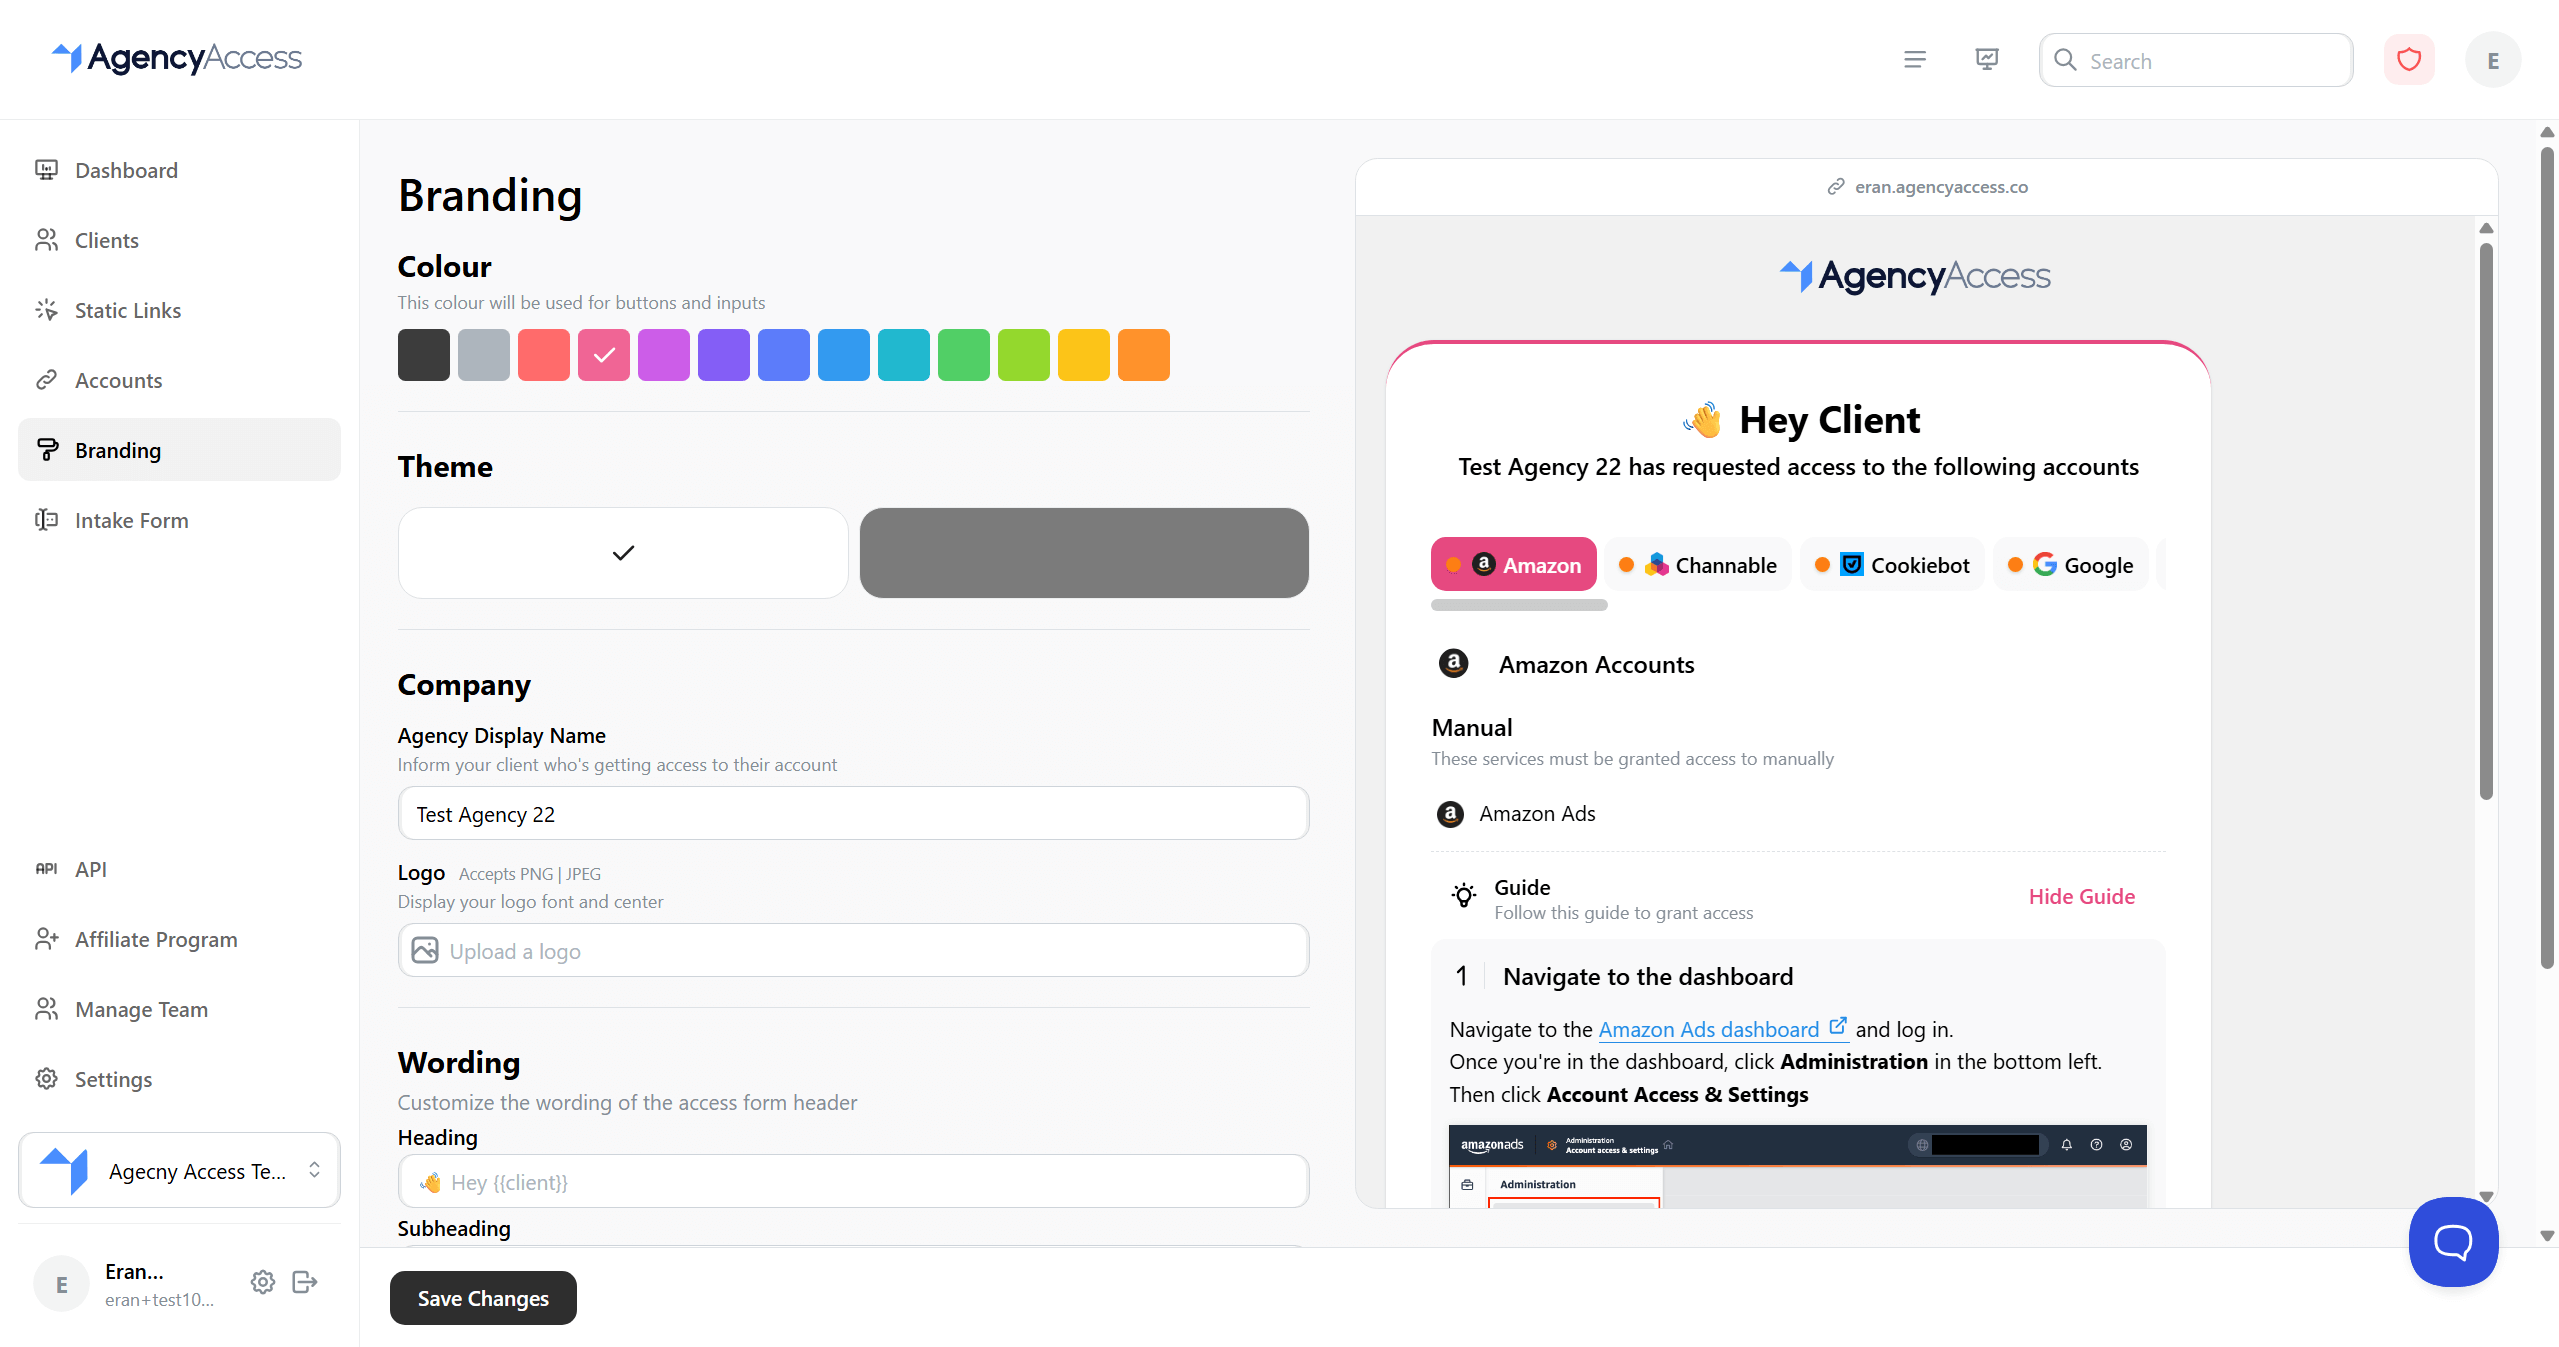
The Branding page lets you change the color, theme, logo, display name, wording, and custom subdomain clients see when they open an invite or access page.
Branding is worth setting up before the first invite. Clients are more likely to complete the request when the page clearly looks like it came from your agency.
Accessing Branding
Go to Dashboard -> Branding.
Plan Requirements
- Color and theme require Premium or higher.
- Logo upload requires Starter or higher.
- Wording customization requires Premium or higher.
- Custom subdomains require Premium or higher.
Color and Theme
Use Colour to choose the accent color used for buttons and inputs. Use Theme to choose the light or dark client-facing layout.
- Go to Branding.
- Choose a color.
- Select the light or dark theme.
- Review the live preview.
- Click Save Changes.
Choose a color with enough contrast against both the page background and button text.
Company
The Company section controls the name and logo clients see.
Agency Display Name
Use Agency Display Name when the name clients should see is different from the agency name in your account.
Leave it blank to use the agency name.
Logo
Upload a logo to show it on client-facing pages and emails.
- Go to Company.
- Upload the logo.
- Check the preview.
- Click Save Changes.
Use a clear PNG or JPEG. A transparent PNG usually works best across light and dark themes.
Wording
The Wording section lets you customize the heading and subheading on the invite page.
Available variables:
{{client}}inserts the client's name.{{agency}}inserts your agency display name or agency name.
Keep this copy short. The page's job is to make the request feel familiar and easy to complete.
Custom Subdomain
Use Custom Subdomain when you want invite and access page URLs to use your branded AgencyAccess subdomain.
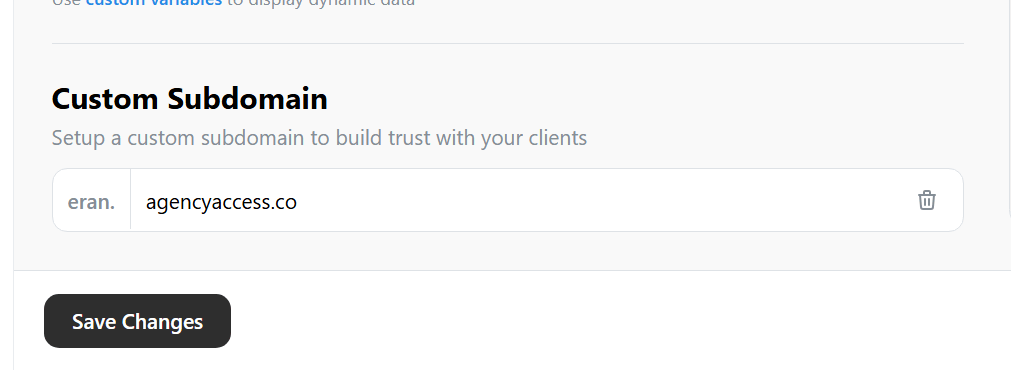
Example:
yourbrand.agencyaccess.coTo claim one:
- Go to Custom Subdomain.
- Enter the subdomain you want.
- Click Save.
- Confirm the subdomain appears as active.
No DNS setup is required. You can release the subdomain later from the same section.
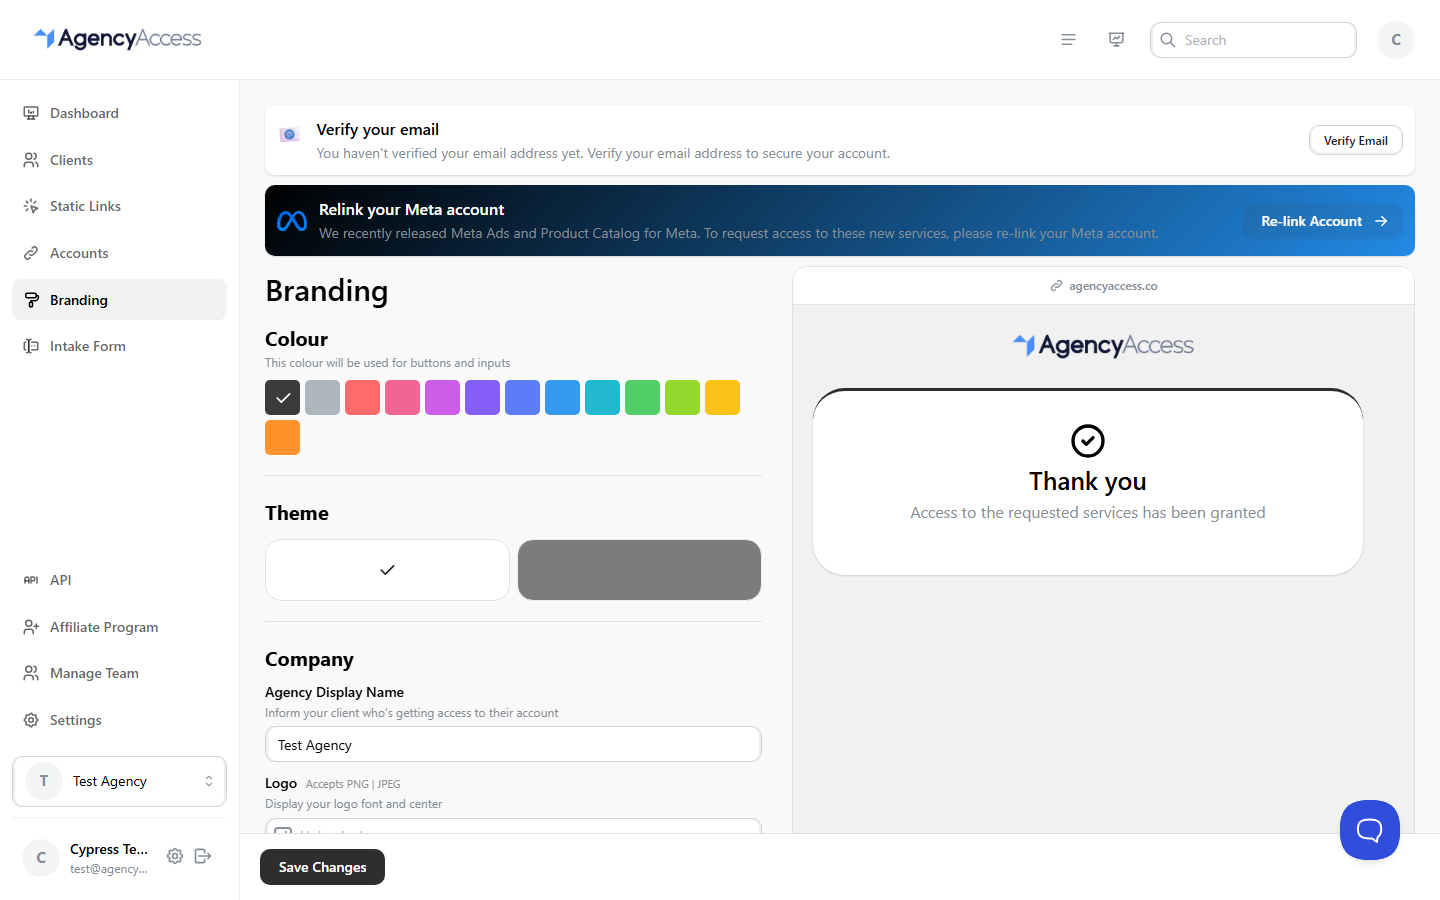
Preview
The right side of the Branding page shows a live preview. Use it to check the invite page before saving.
Preview the experience with:
- Your logo.
- Light and dark themes.
- Different colors.
- Custom wording.
Saving Changes
Click Save Changes after editing branding. Saved branding applies to client-facing invites, access pages, and related emails.
If something looks wrong, refresh the preview or open a test invite in a private browser window.
Troubleshooting
Logo is not available
Check that your plan includes logo upload. Starter and higher plans include custom logos.
Color, theme, or wording is locked
Those controls require Premium or higher.
Subdomain cannot be saved
Confirm the subdomain is available and that your plan includes subdomains.