Welcome to AgencyAccess! We're excited to help you get started.
In this guide we'll show you how to connect your accounts, customize your branding and send your first client request. The whole process takes 10-15 minutes at most. Let's get started.
Quick Start
- Connect at least one agency account on the Accounts page.
- Customize branding on the Branding page.
- Create a client or choose an existing one.
- Create a client invite for that access request.
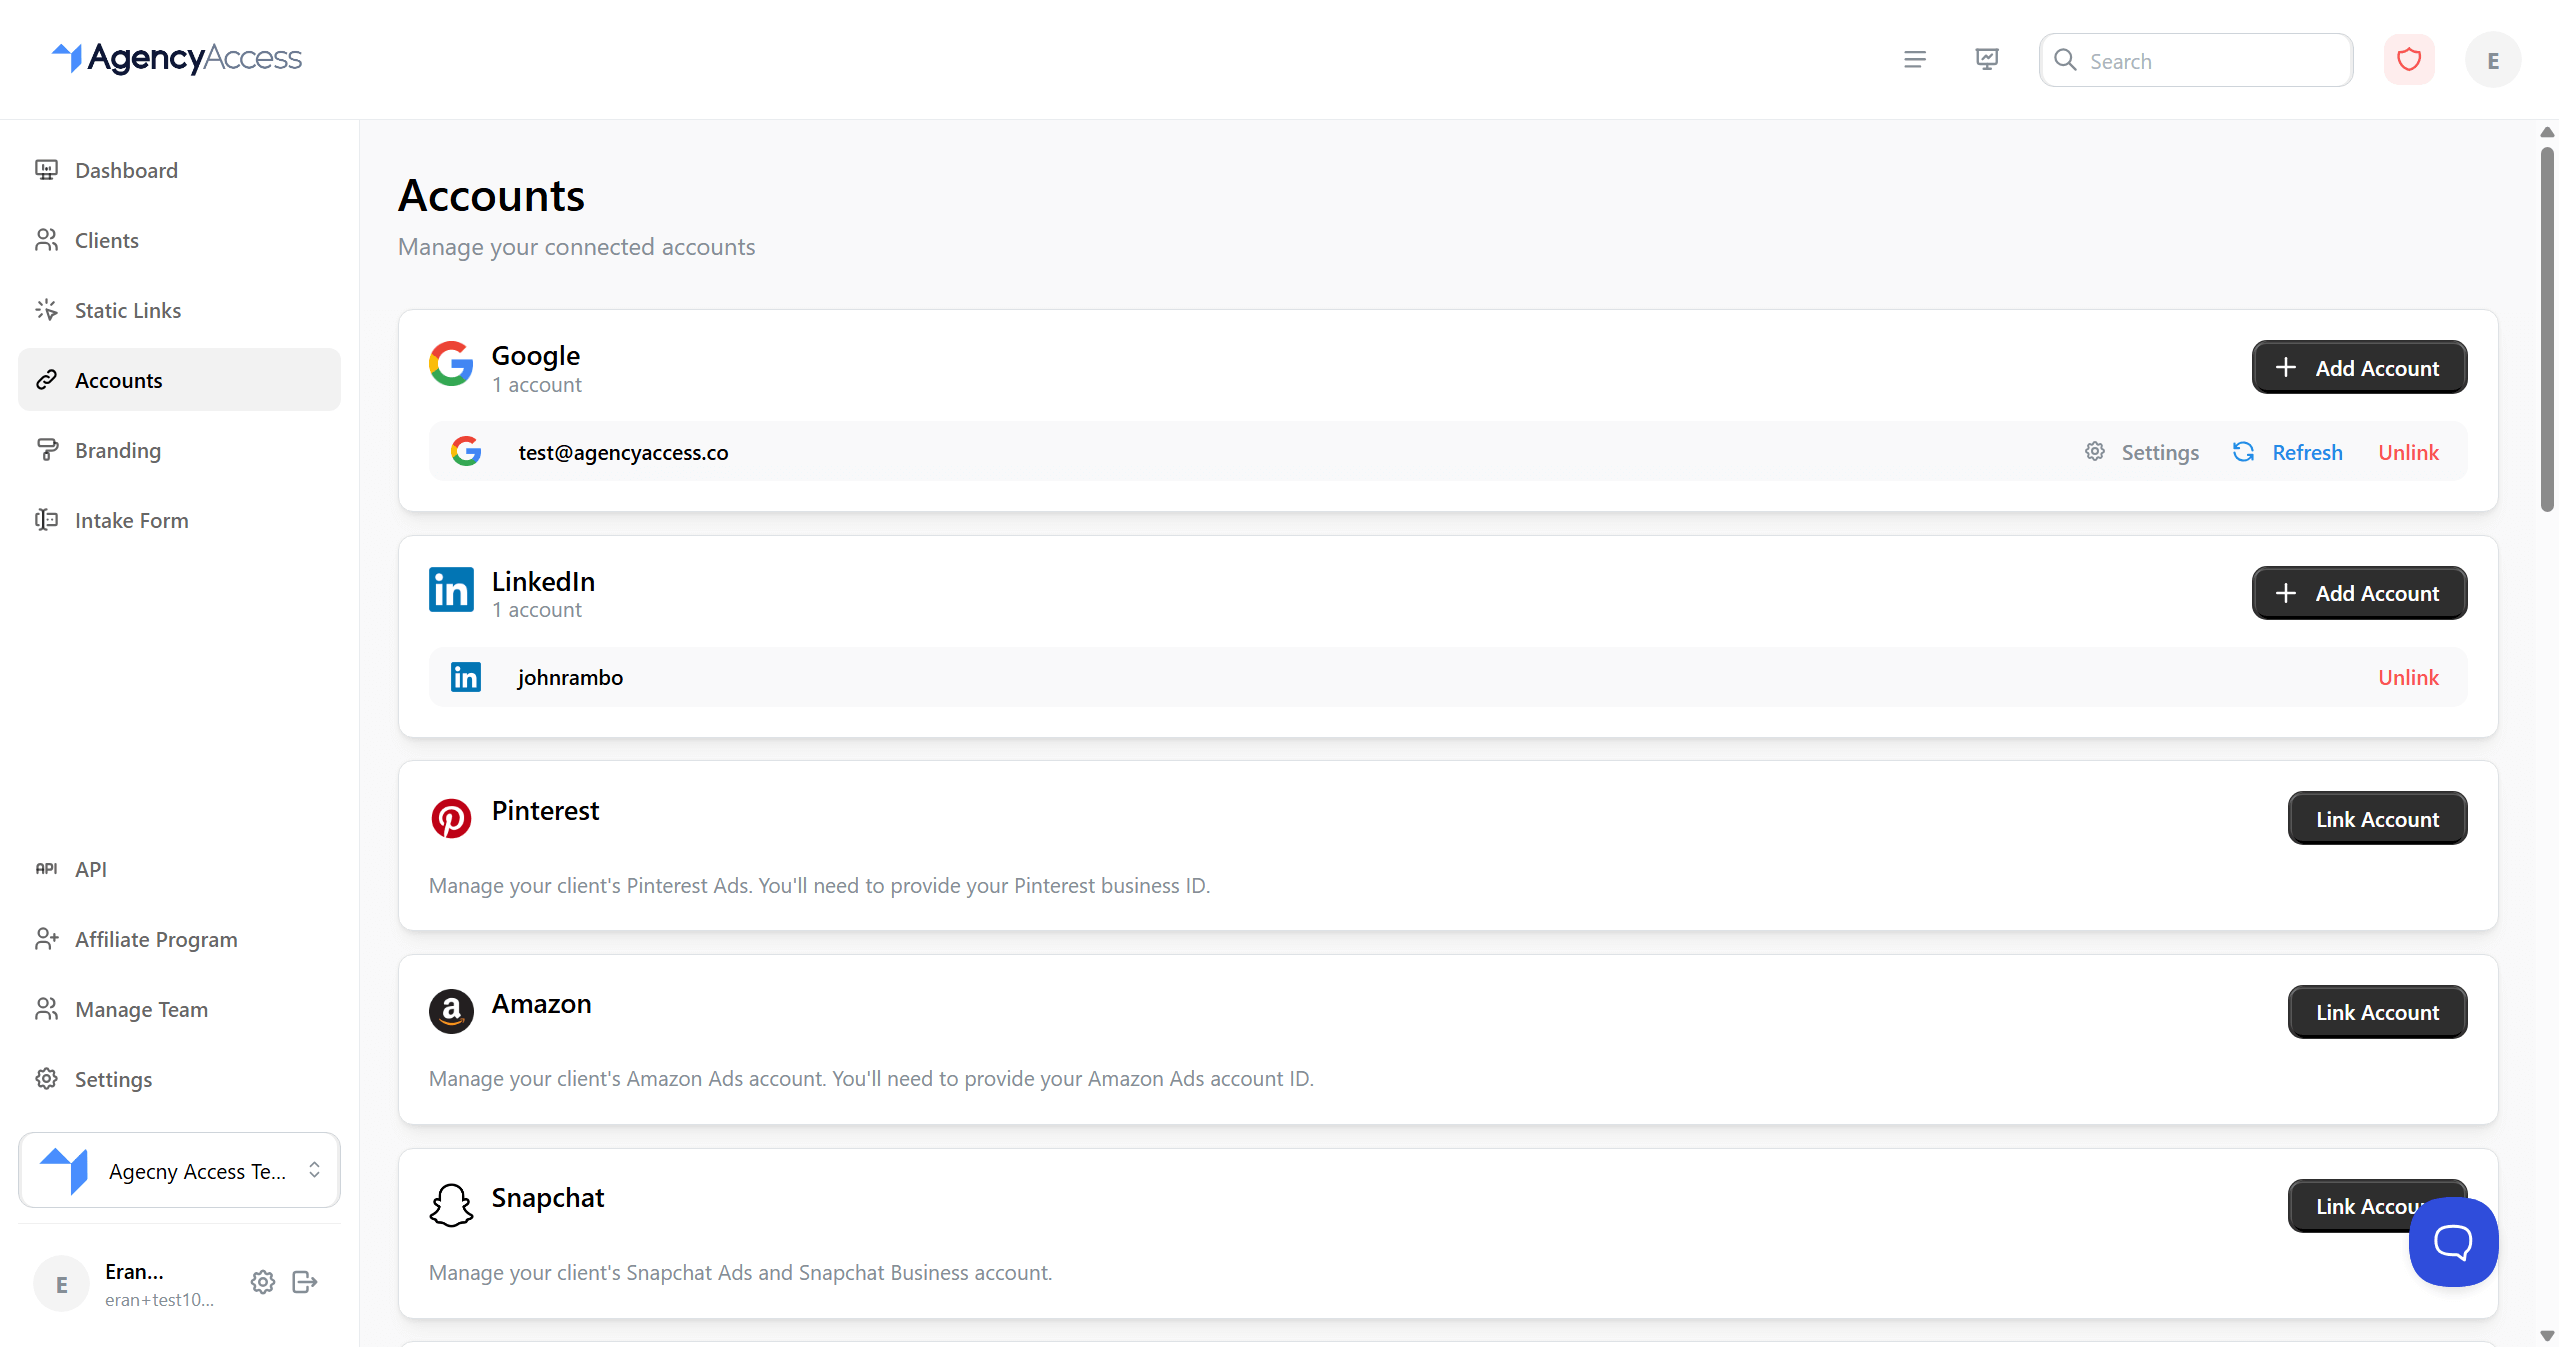
Step 1: Connect Your Agency Accounts
Before you can request access from a client, you need to connect the accounts that your client will provide access to.
For example, if you want a client to grant access to Google Ads, connect the Google account or Google Ads Manager Account your agency uses. If you want a client to grant access to Meta assets, connect the Meta account your agency uses.
- Go to Accounts.
- Find the platform you want to connect.
- Click Link Account.
- Complete the OAuth or platform-specific connection flow.
- Confirm the account appears as connected.
You can connect more accounts later. For detailed platform requirements, multiple-account handling, refresh behavior, and unlinking, see Managing Connected Accounts.
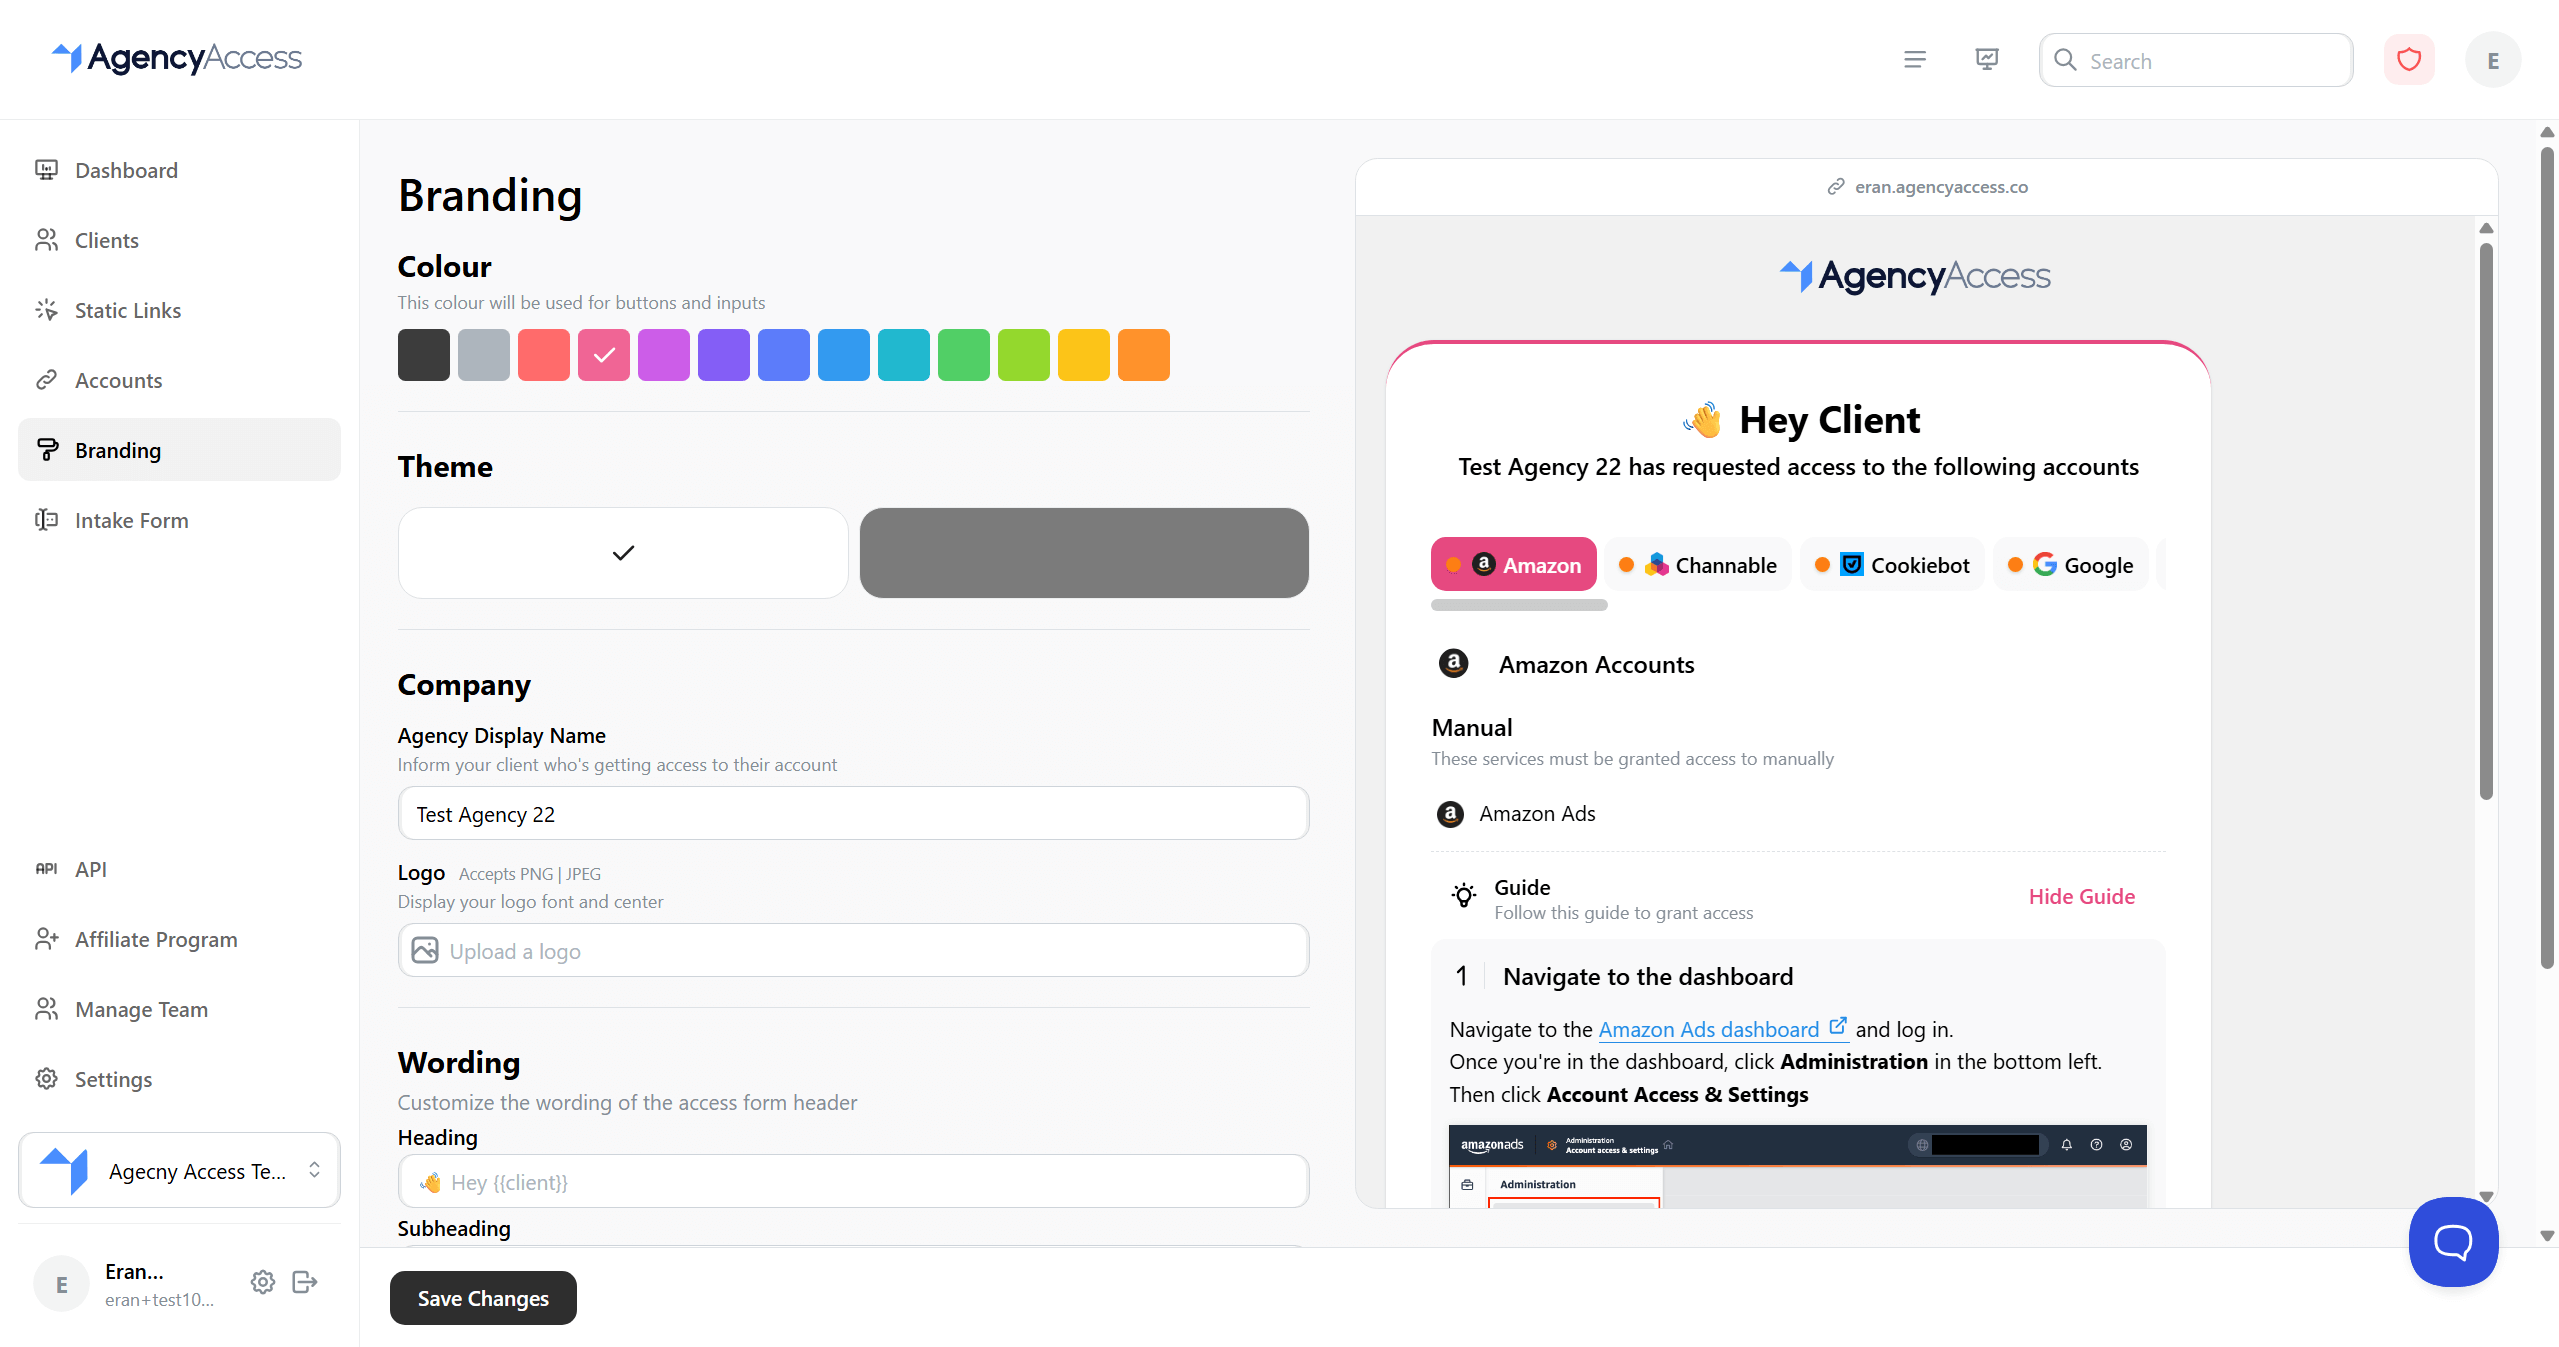
Step 2: Set Up the Client-Facing Experience
Clients see your invite page when they open the invite. Before sending the first one, check the basics:
- Agency display name
- Logo
- Brand color
- Light or dark theme
- Client-facing wording
- Thank you message or redirect behavior, if needed
- Go to Branding.
- Upload your logo, if your plan includes logo upload.
- Choose the brand color and theme.
- Update any client-facing wording.
- Save your changes.
Branding can be changed later. Saved branding applies to client-facing pages, including existing invites.
For the full branding reference, including subdomains and wording options, see Customizing Branding.
Step 3: Create Your First Client
Each invite belongs to a client or prospect. Creating the client first makes it easier to track outstanding requests and granted access later.

- Go to Clients.
- Click Create Client.
- Add the client's name, email, company, and website if available.
- Choose whether the contact is a client or prospect.
- Save the client.
You can also create a client while creating the invite. If this is your first request, creating the client first is usually clearer.
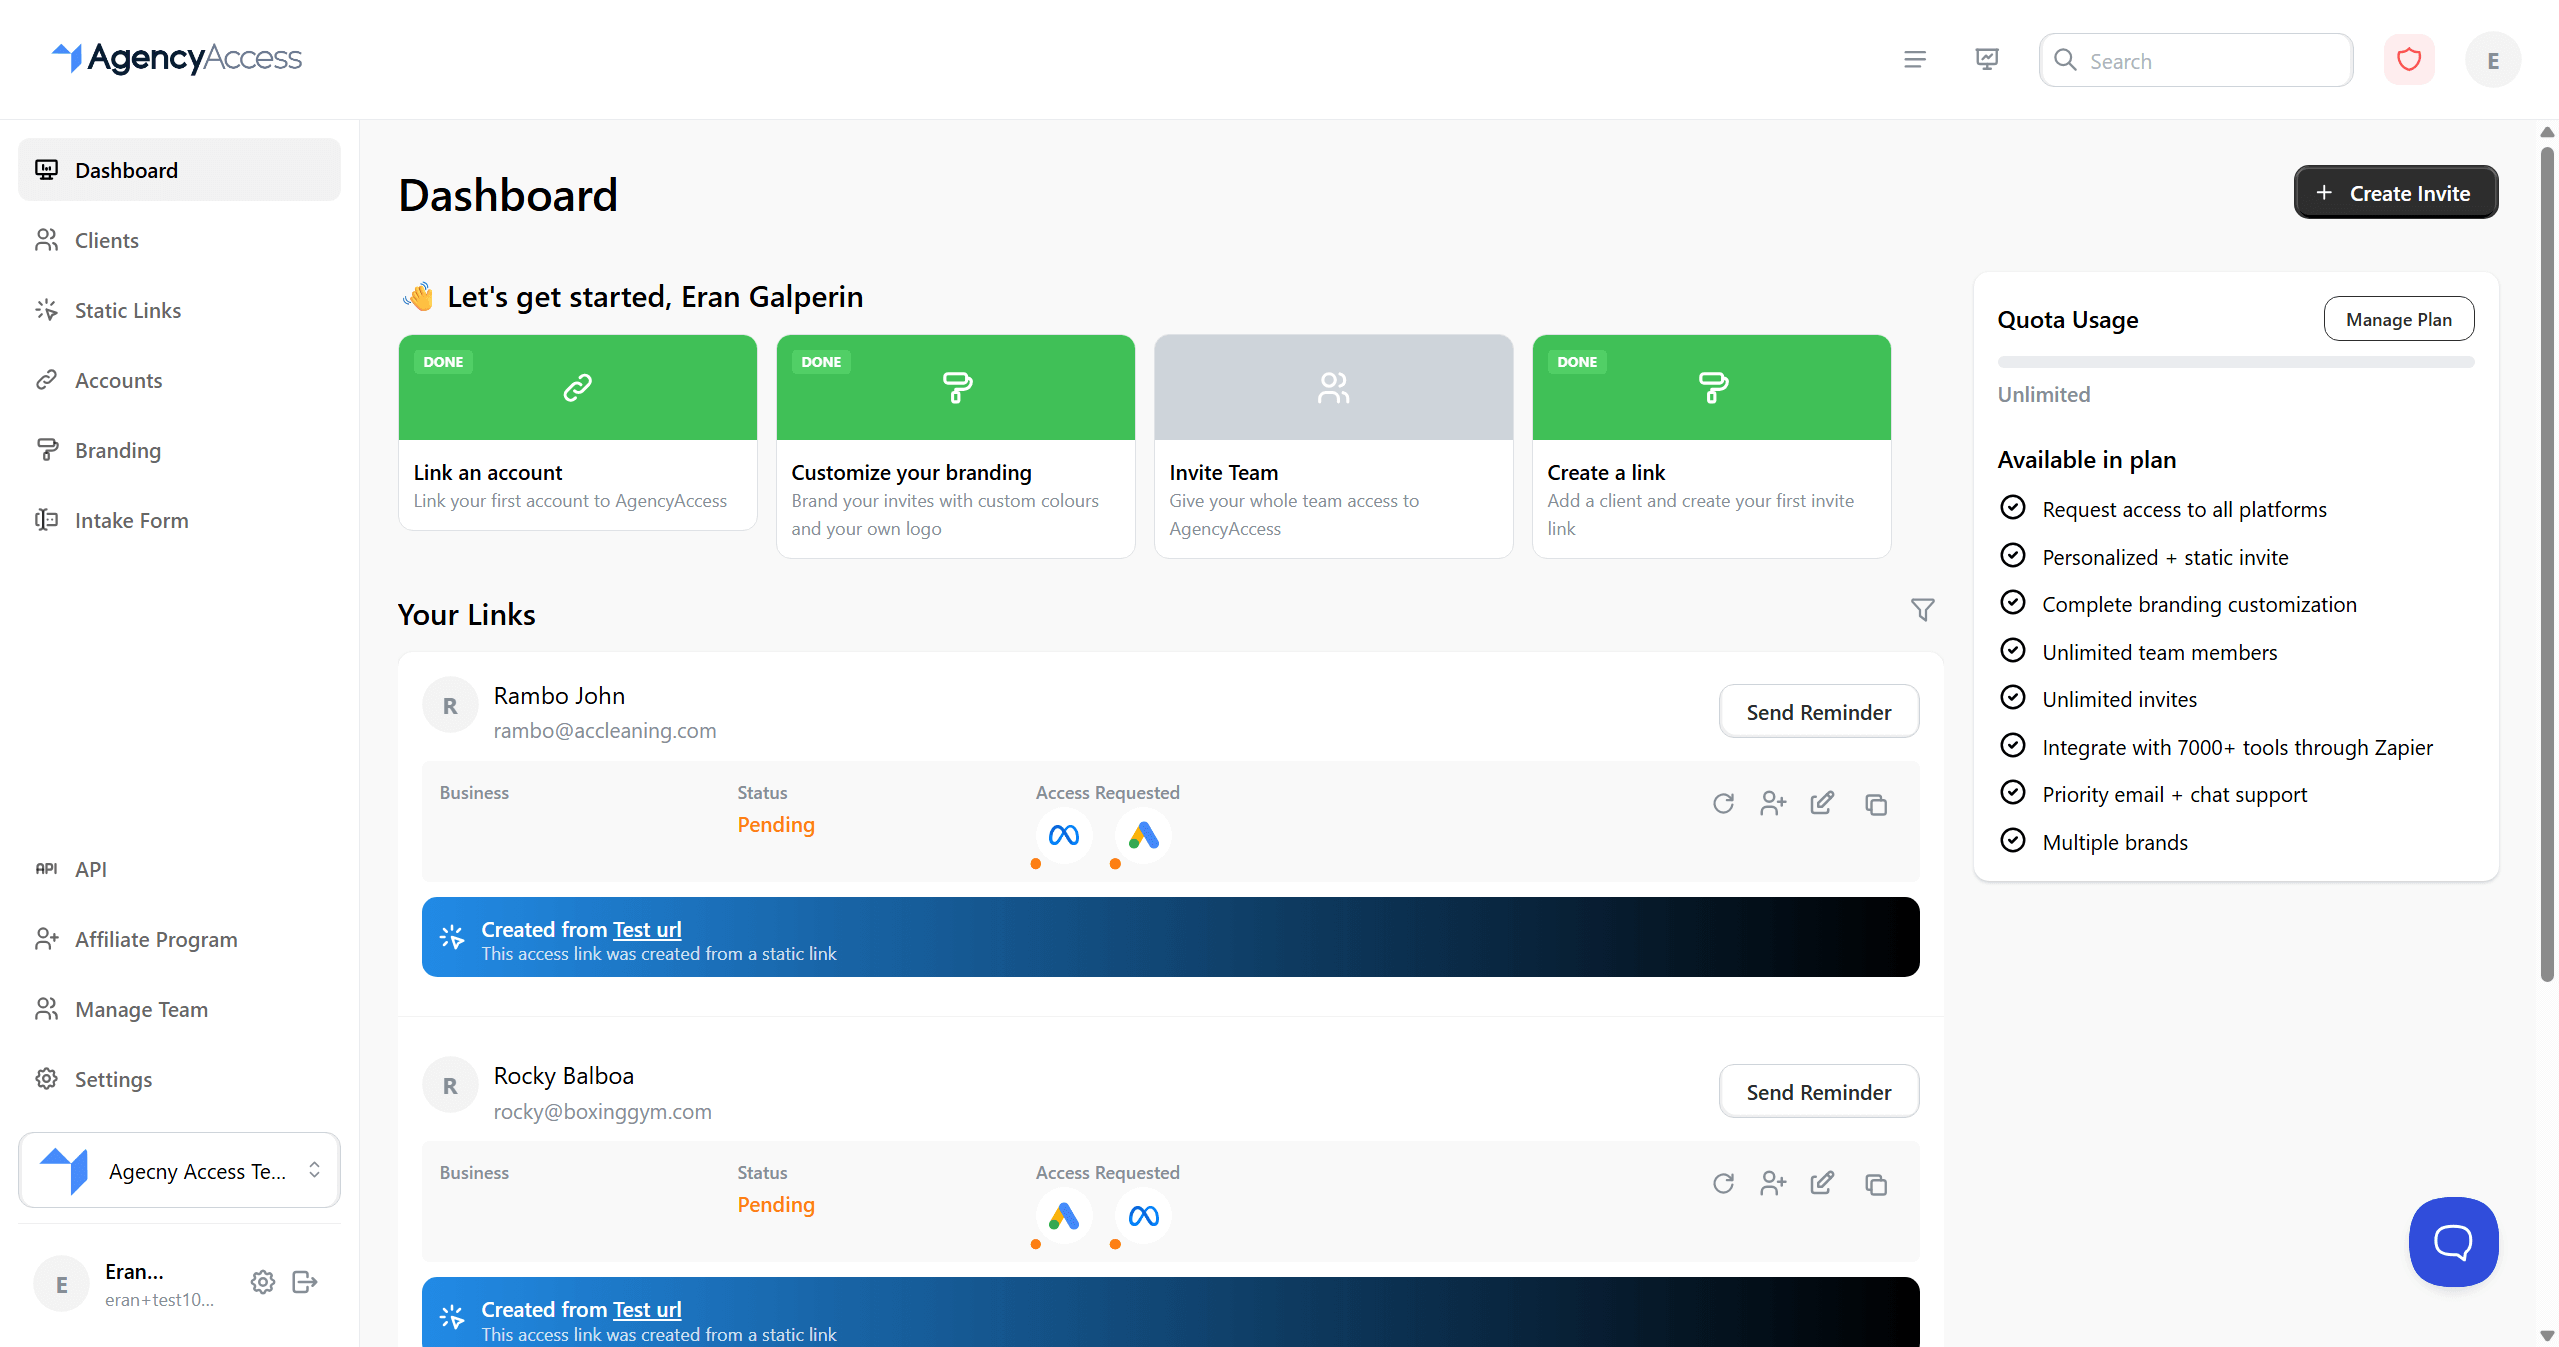
Step 4: Create Your First Client Invite
Now we'll create the invite your client will receive. This is where you choose what access you need, preview what the client will see and send the request.
- Go to Dashboard.
- Click Create Invite.
- Choose the client you created, or create a new one from the invite modal.
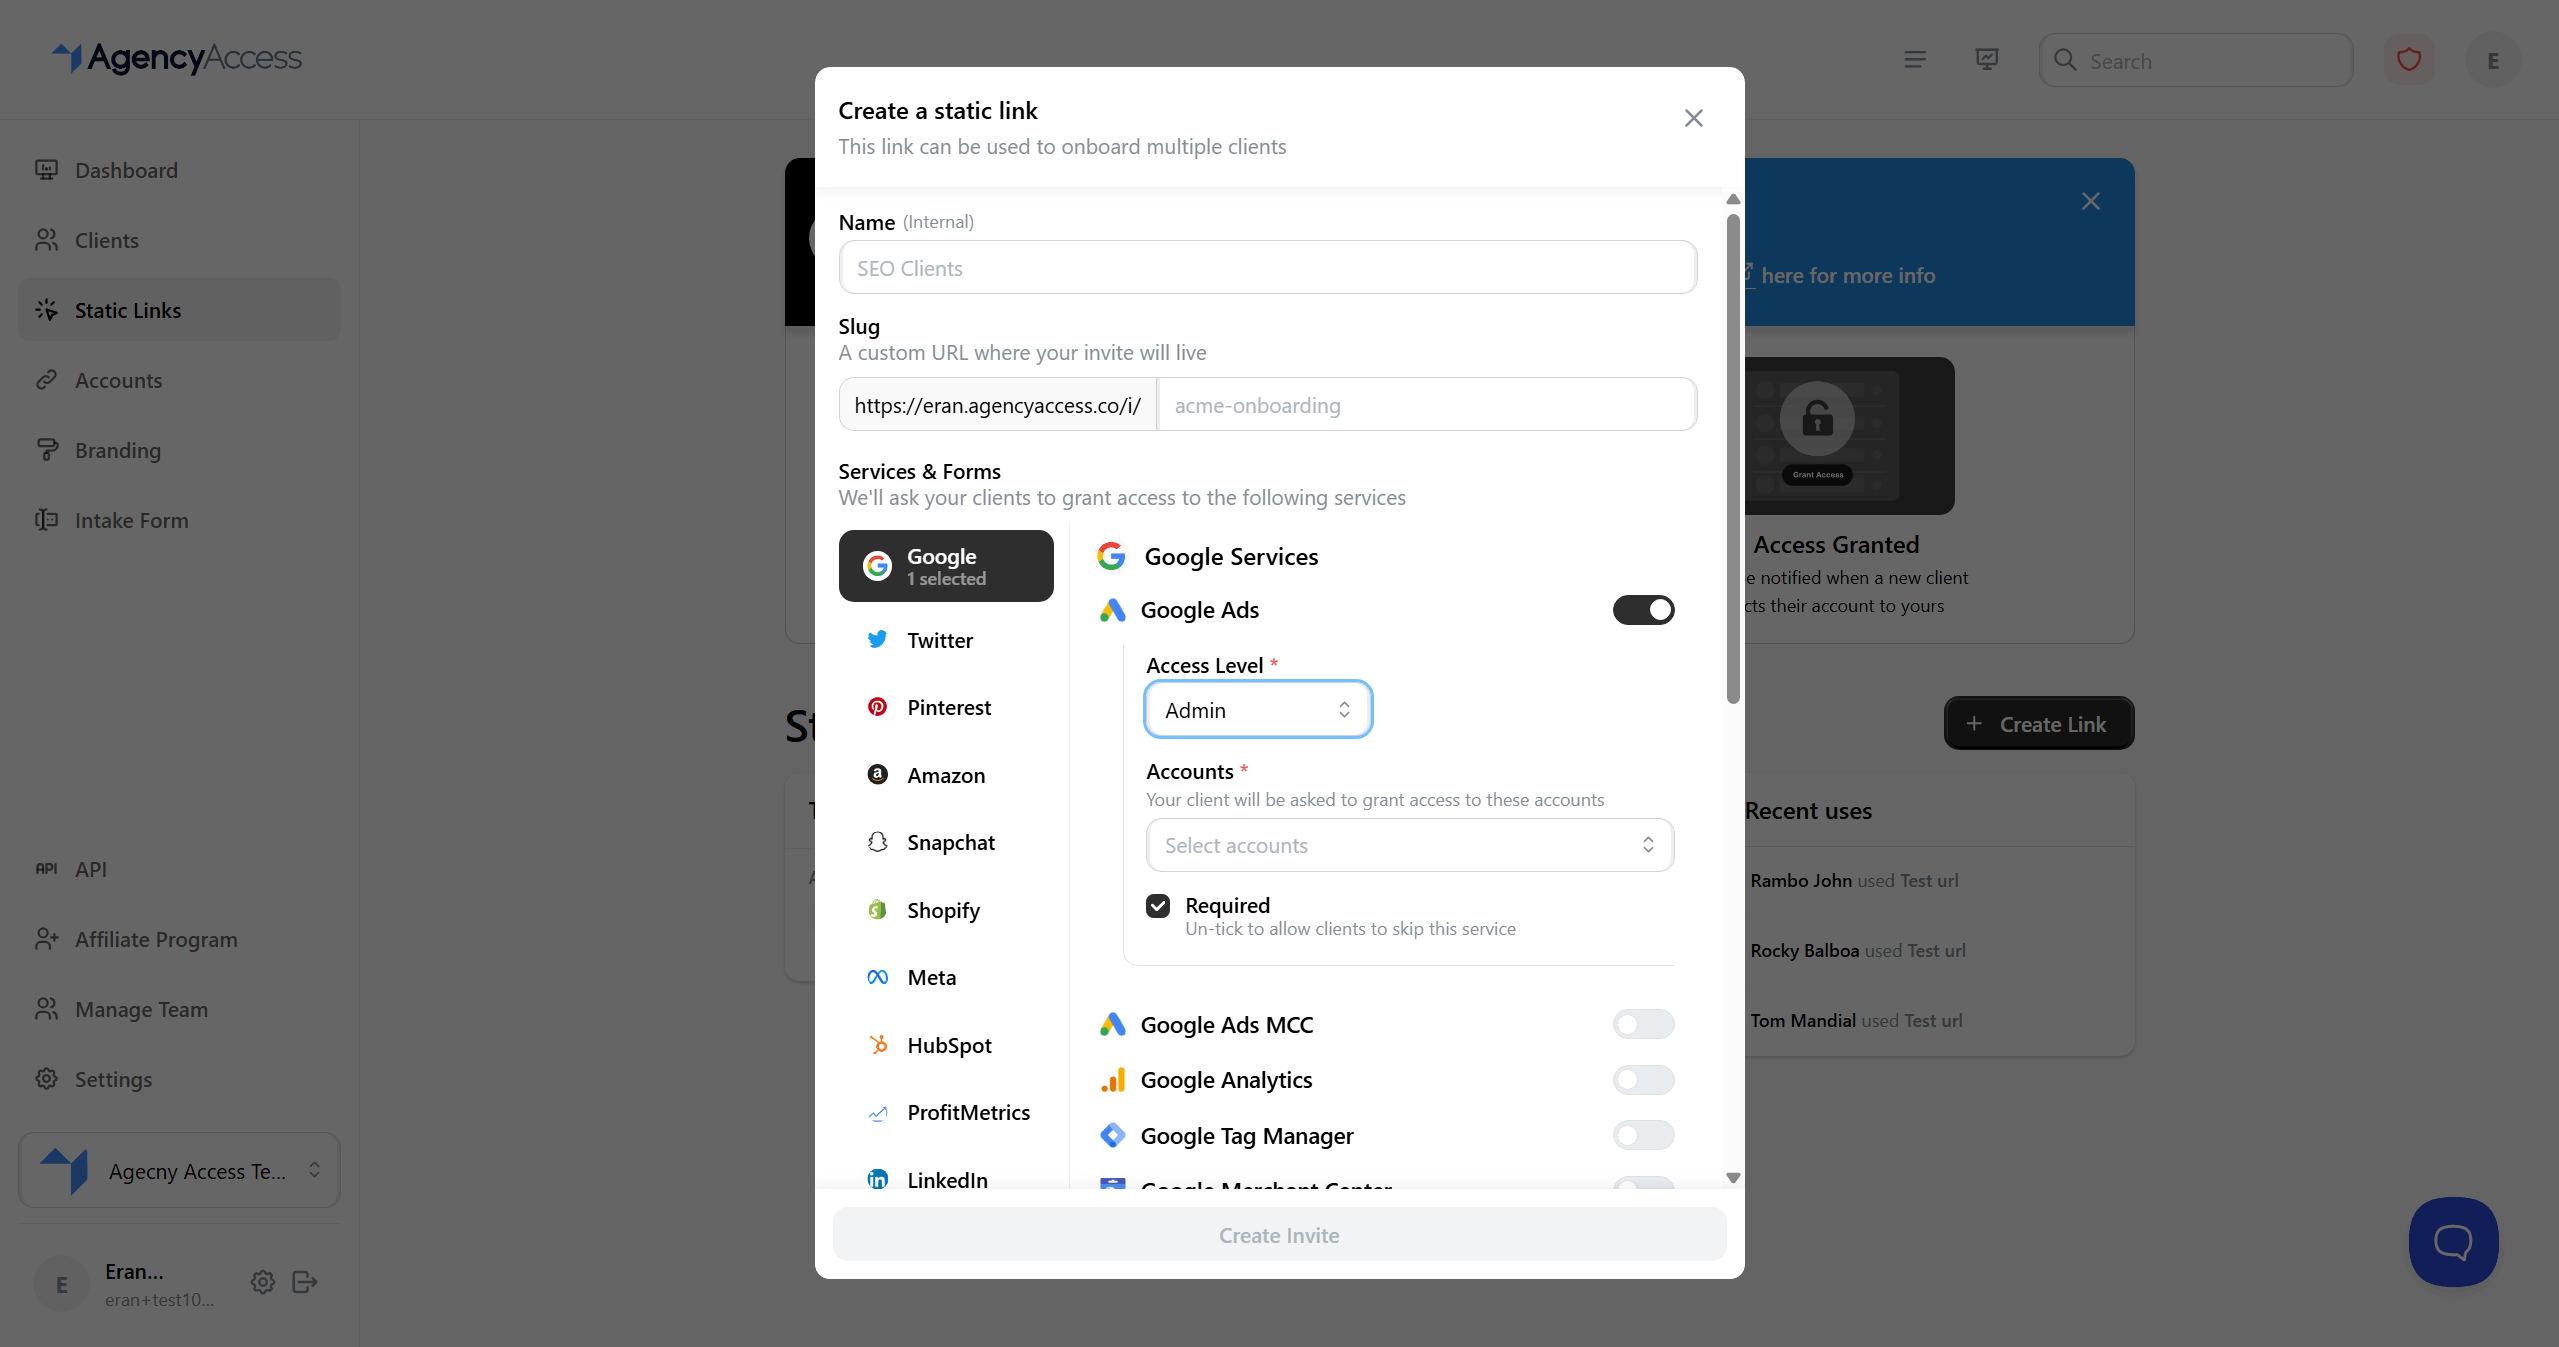
- On Choose accounts, select the services you need the client to grant access to.
- For each service, choose the connected agency account that should receive access.
- Choose the access level where the platform asks for one.
- Turn on Intake Form if you want the client to answer your intake questions while completing the invite.
- Use Preview your link to check the access form, intake form and email before sending.
- On Thank you page, add an optional message and next step link for the client.
- Review everything on Preview summary.
- Leave Send email notification checked if you want AgencyAccess to email the invite to your client.
- Click Send.
That's it. We'll create a unique onboarding link for the client and, if email notification is enabled, send it to them right away. You can also copy the link from the success screen and send it yourself.
When the client opens the invite, they'll grant access to the services you requested. You can track the request from the dashboard or from the client's profile.
Try to keep the first invite focused. Only request the services you actually need right now. Smaller requests are easier for clients to complete and easier for your team to troubleshoot.
For the full invite workflow, including editing requests, reminders, CC recipients, statuses and client history, see Managing Clients and Sending Invites.
Optional Setup
These settings are useful, but they do not need to block your first client invite.
Intake Forms
Use intake forms when you want to collect extra information while the client grants access, such as business goals, account IDs, budget, or campaign notes.
Access Pages
Use access pages when you want a reusable onboarding page for many clients or prospects, such as a website CTA, sales email, or onboarding checklist.
See Access Pages.
Team Access
Invite teammates when more than one person needs to create invites, manage clients or track access requests.
See Managing Your Team.
API Access
Use the API when you want to create clients or client invites from another system.
See Utilizing the API.
Troubleshooting
I cannot create an invite
Make sure at least one relevant agency account is connected on the Accounts page. For most services, AgencyAccess needs a connected agency account before it can request client access to that service.
The platform I need is not available in the invite builder
Check whether the matching agency account has been connected first. If the platform still does not appear, review Managing Connected Accounts for platform-specific requirements.
The client says they cannot grant access
Ask the client to confirm they are signing in with an account that has permission to grant access. Some platforms require admin, business manager, partner, or owner-level permissions.
The invite page does not look right
Review the Branding page, save the latest settings, and reopen the invite in a private browser window. If you use a custom subdomain, confirm the domain setup is complete.
I want to change the request after sending it
Open the invite from the dashboard or client detail page and use the edit action. Some changes may require the client to grant access again.