This guide explains how to create and manage reusable access pages.
Access pages are useful when you do not want to create a client first. A client or prospect opens the page, enters their details, and AgencyAccess creates the client and invite from that submission.
Overview
Use access pages for:

- Website CTAs.
- Sales proposals.
- Onboarding emails.
- Repeatable requests for the same set of services.
- QR codes or shared onboarding material.
Plan Requirements
Access pages require a plan that includes access pages. The create modal shows an upgrade prompt if your current plan does not include them or you have reached your access page limit.
Accessing Access Pages
Go to Dashboard -> Access Pages.
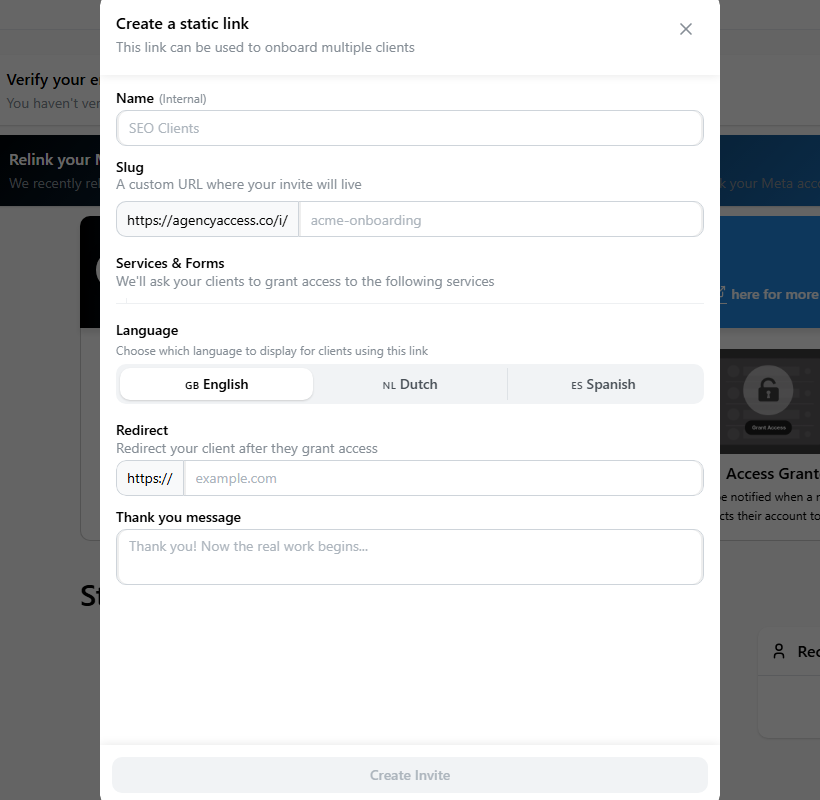
Creating an Access Page
- Go to Access Pages.
- Click Create Access Page.
- Add an internal Name.
- Choose a slug.
- Select services and connected agency accounts under Services & Forms.
- Turn on Intake Form if every user of the page should answer intake questions.
- Choose the client-facing language.
- Add an optional redirect.
- Add an optional thank you message.
- Click Create Access Page.
The slug cannot be changed after creation. Create a new access page if you need a different URL.
Access Page URL
Access page URLs use the invite route with the access-page flag:
https://agencyaccess.co/i/your-slug?s=trueWith a custom subdomain:
https://yourbrand.agencyaccess.co/i/your-slug?s=trueClient Experience
When someone opens an access page:
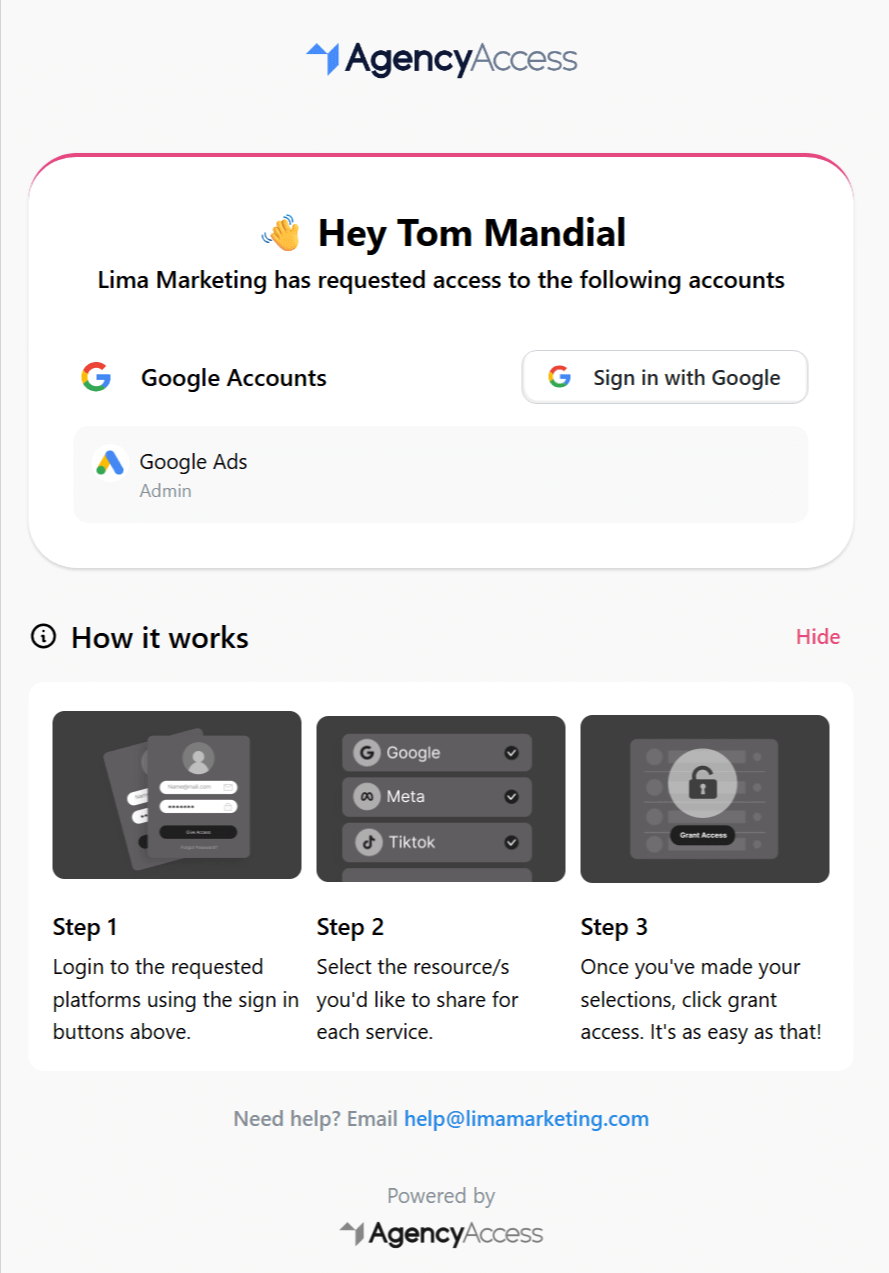
- They see your branded page.
- They enter their name, email, and company details.
- They answer intake questions if the page requests them.
- AgencyAccess creates the client record.
- The client grants the requested access.
- They see your thank you message or redirect.
Each submission creates a new client invite connected to the access page.
Managing Access Pages
The Access Pages page shows each page, its URL, requested services, intake form status, and quick actions.
You can:
- Copy the page URL.
- Edit requested services, intake form setting, language, redirect, and thank you message.
- Delete the access page.
- Review recent clients created from access pages.
Changes apply to future submissions. Existing clients and invites are not changed.
Access Pages vs Client Invites
Best Practices
- Use clear internal names.
- Keep slugs short and recognizable.
- Request only the services needed for that page.
- Use a thank you message or redirect to give the client a next step.
- Review clients created from access pages regularly.
Troubleshooting
Access page URL does not work
Check the slug, confirm the page has not been deleted, and use the /i/{slug}?s=true format.
Client was not created
The person may not have completed the page. Ask them to try again and confirm they submitted their details.
Access is still pending
Open the generated invite from the dashboard or client profile to see which service still needs attention.