This guide explains the agency and personal settings available in AgencyAccess.
Overview
Settings are split between agency settings in the dashboard and personal account settings under your profile.
Use settings to manage:
- Agency details.
- Team access.
- Notifications.
- Zapier.
- Billing.
- Personal profile and security.
- Affiliate program.
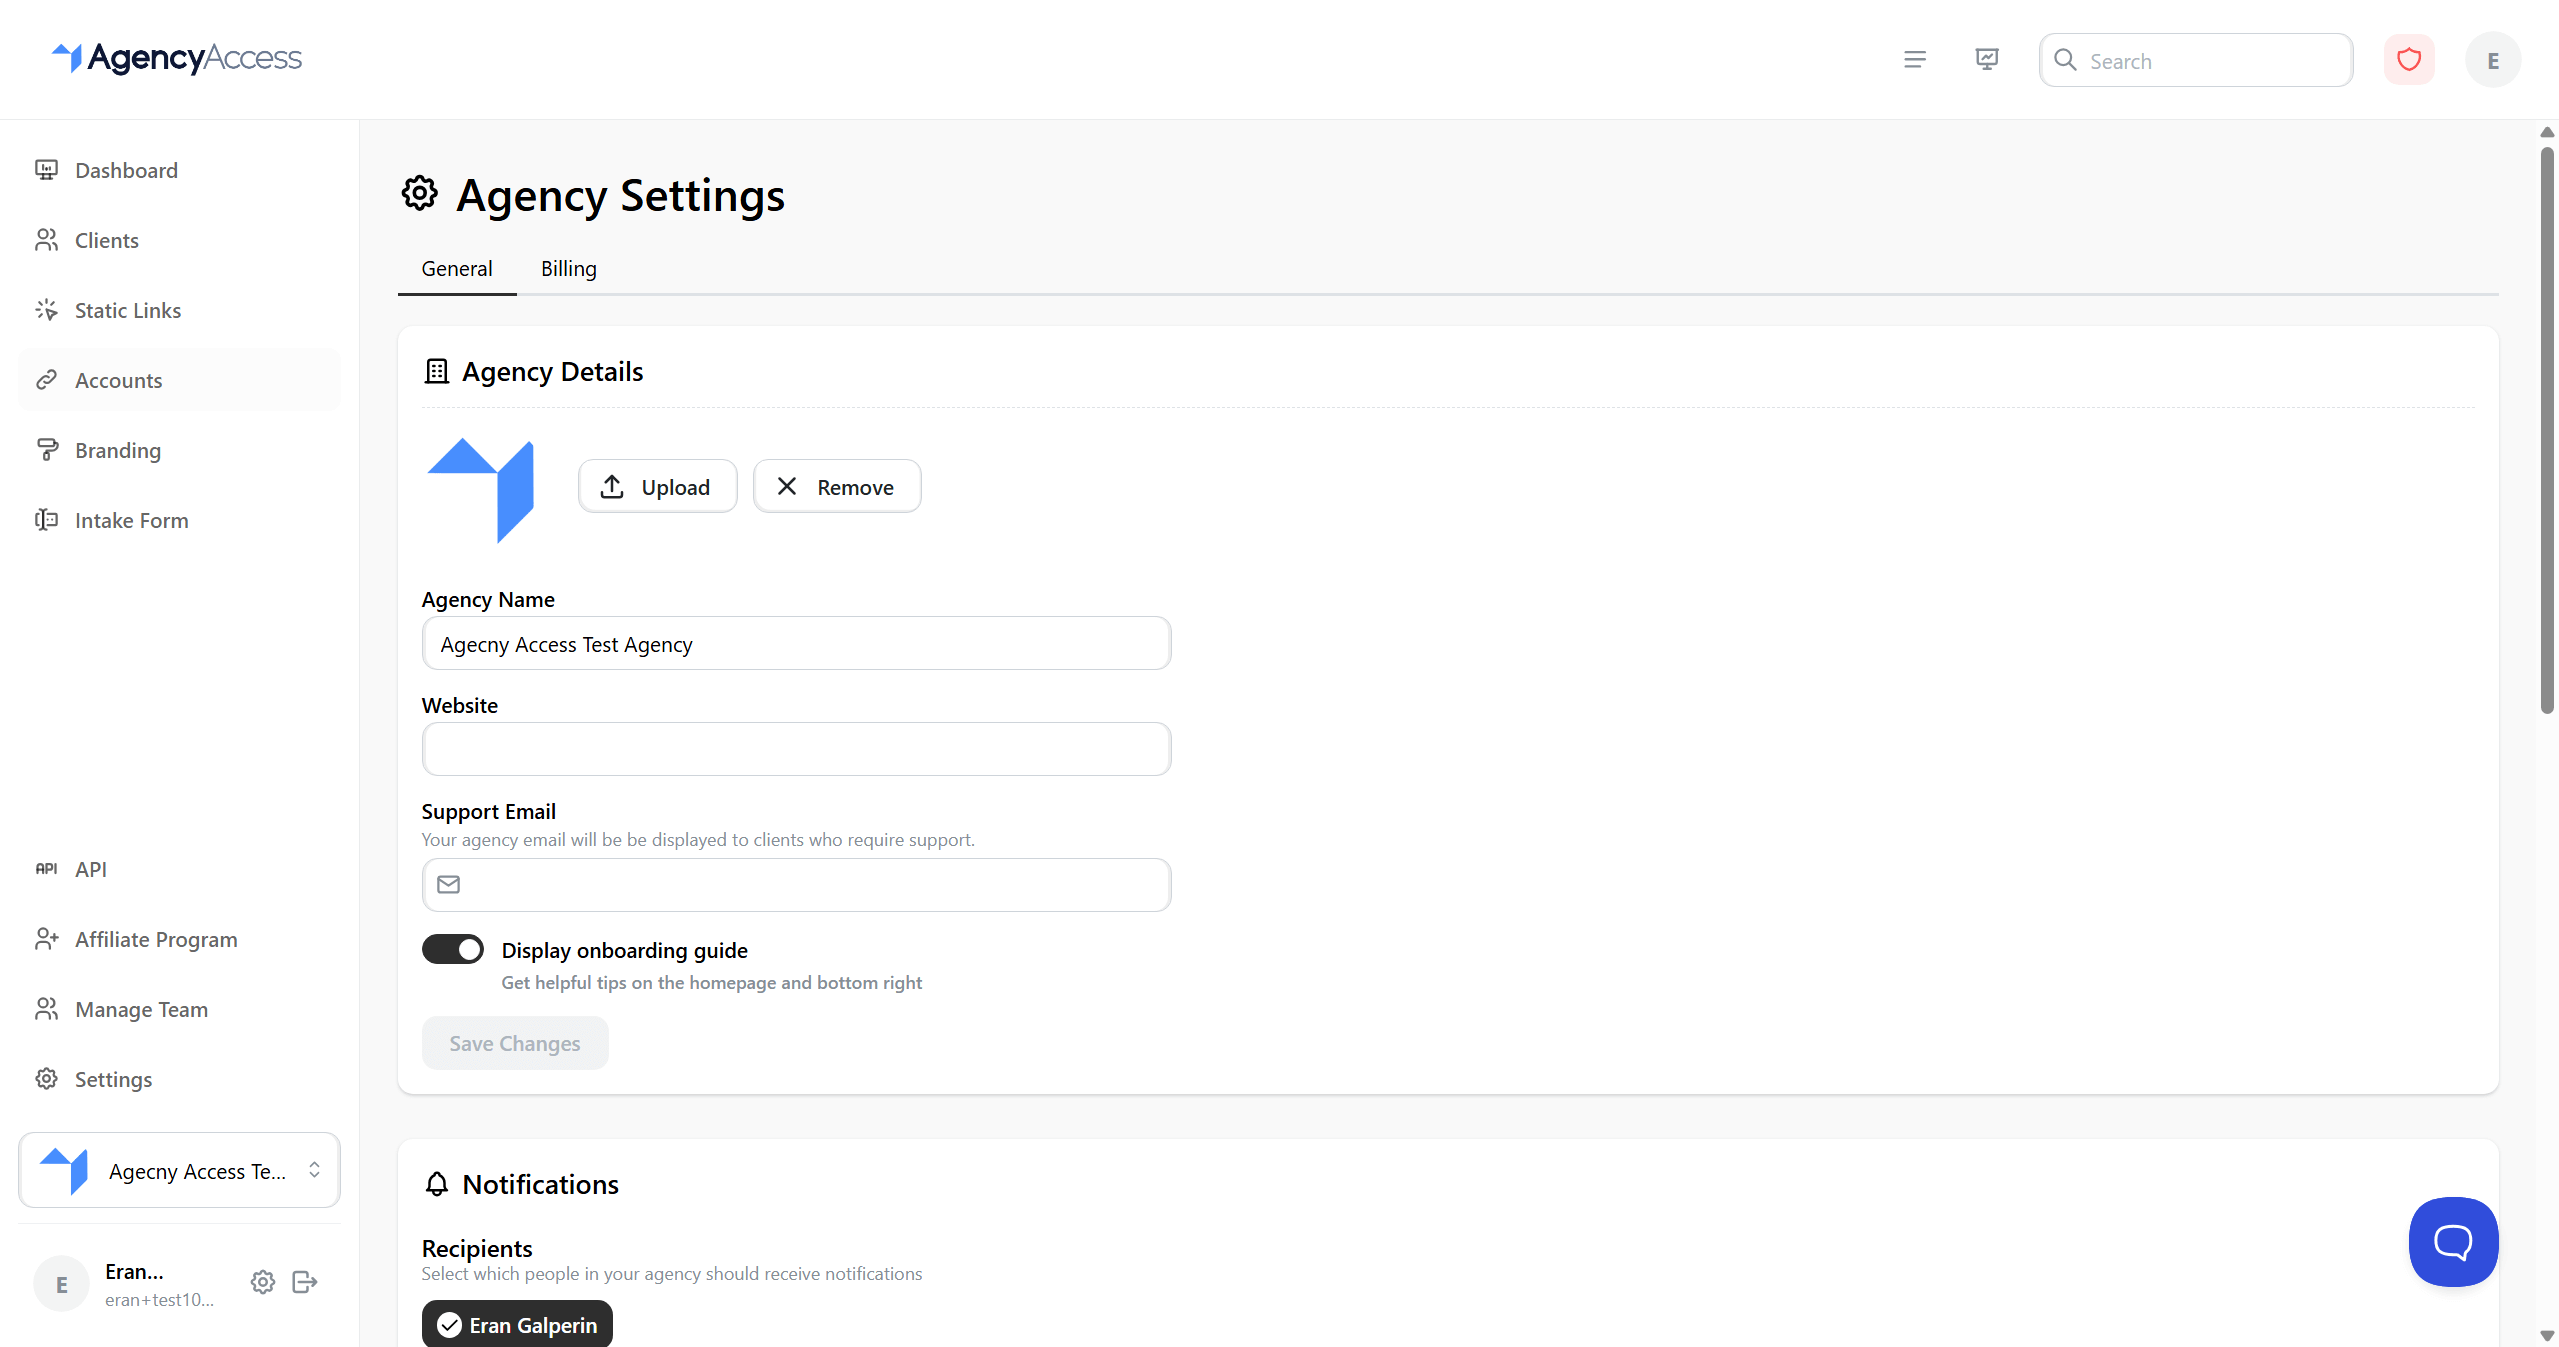
Agency Details
Go to Dashboard -> Settings -> General.
In Agency Details, you can update:
- Agency name.
- Website.
- Support email.
- Whether the onboarding guide should be shown.
Click Save Changes after editing agency details.
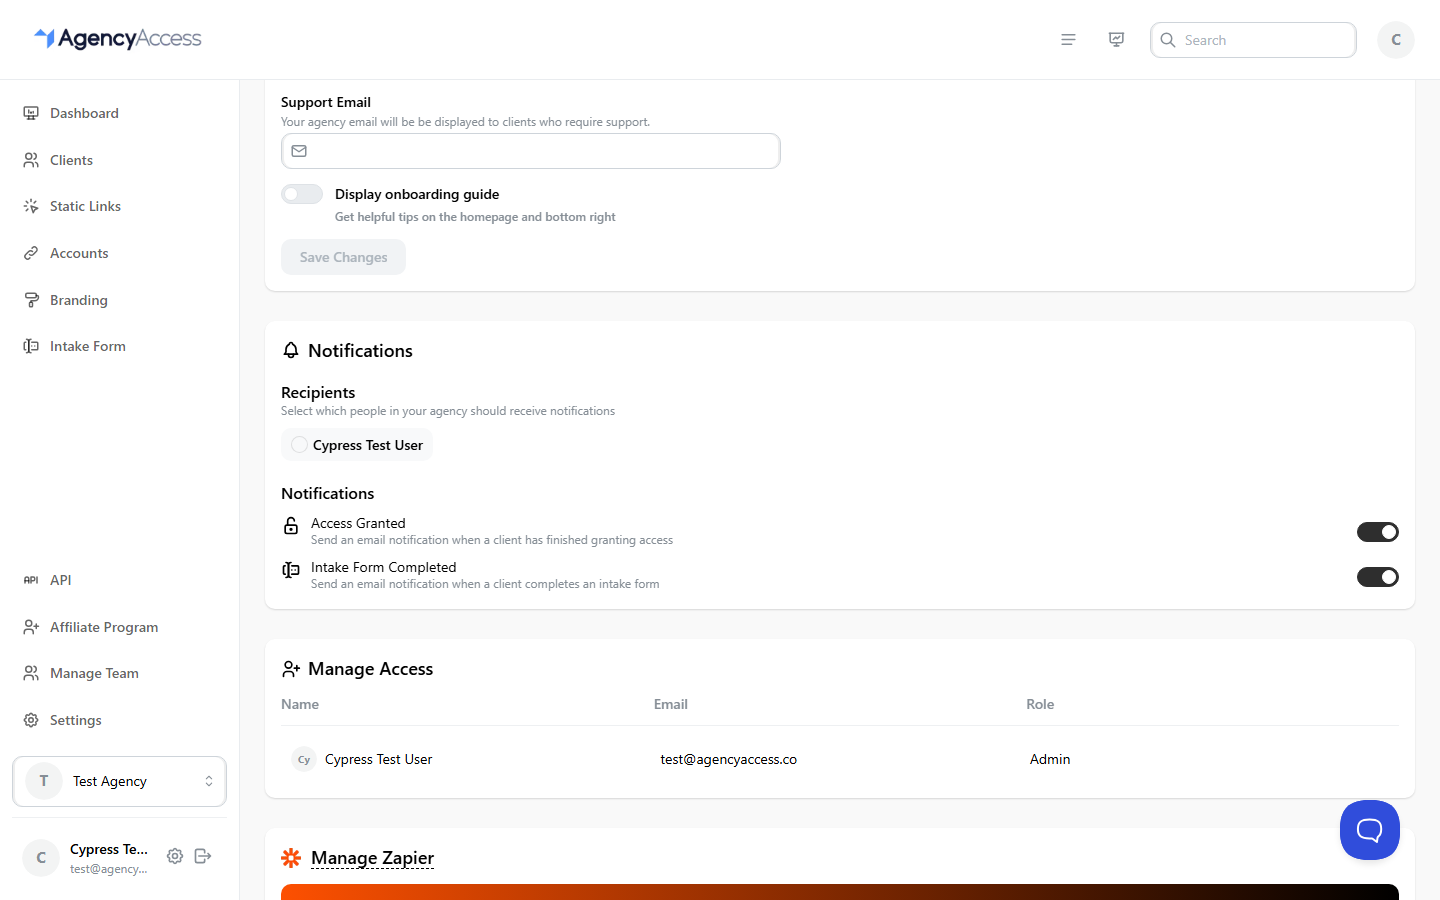
Notifications
The Notifications section controls which teammates receive agency notification emails.
You can choose recipients and toggle notification types such as:
- Access Granted
- Intake Form Completed
Changes save from the settings controls.
Manage Access
Use Manage Access to invite teammates, remove members, and transfer ownership.
For the full workflow, see Managing Your Team.
Zapier
The Manage Zapier section provides the Zapier key and setup guide for connecting AgencyAccess to Zapier.
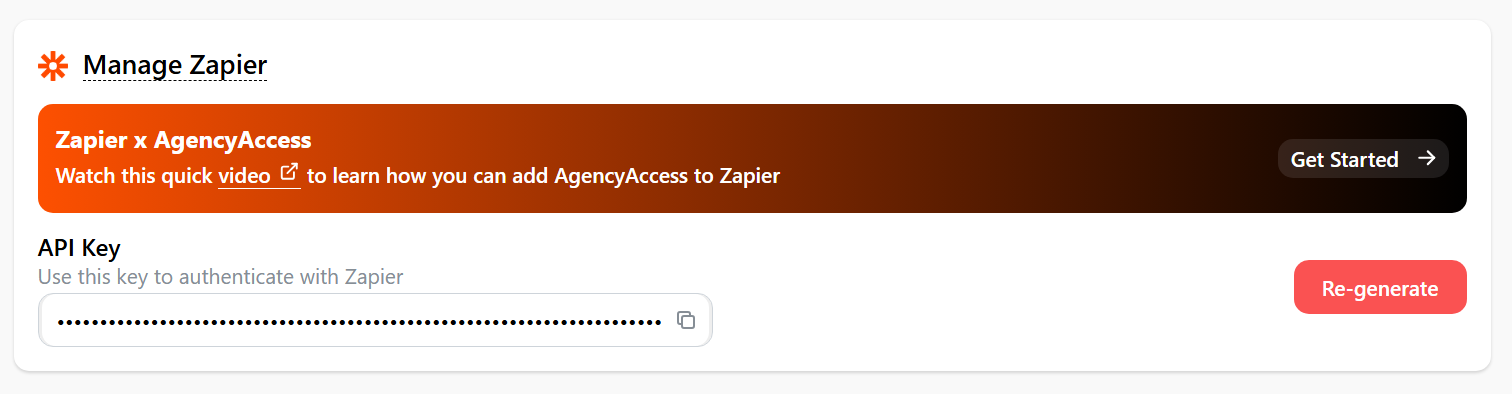
Zapier can use events such as client creation, access granted, intake form completion, and webhook failures.
The Zapier integration is available on plans that include it. If your plan does not include Zapier, the settings panel shows an upgrade prompt.
Billing
Go to Dashboard -> Settings -> Billing.
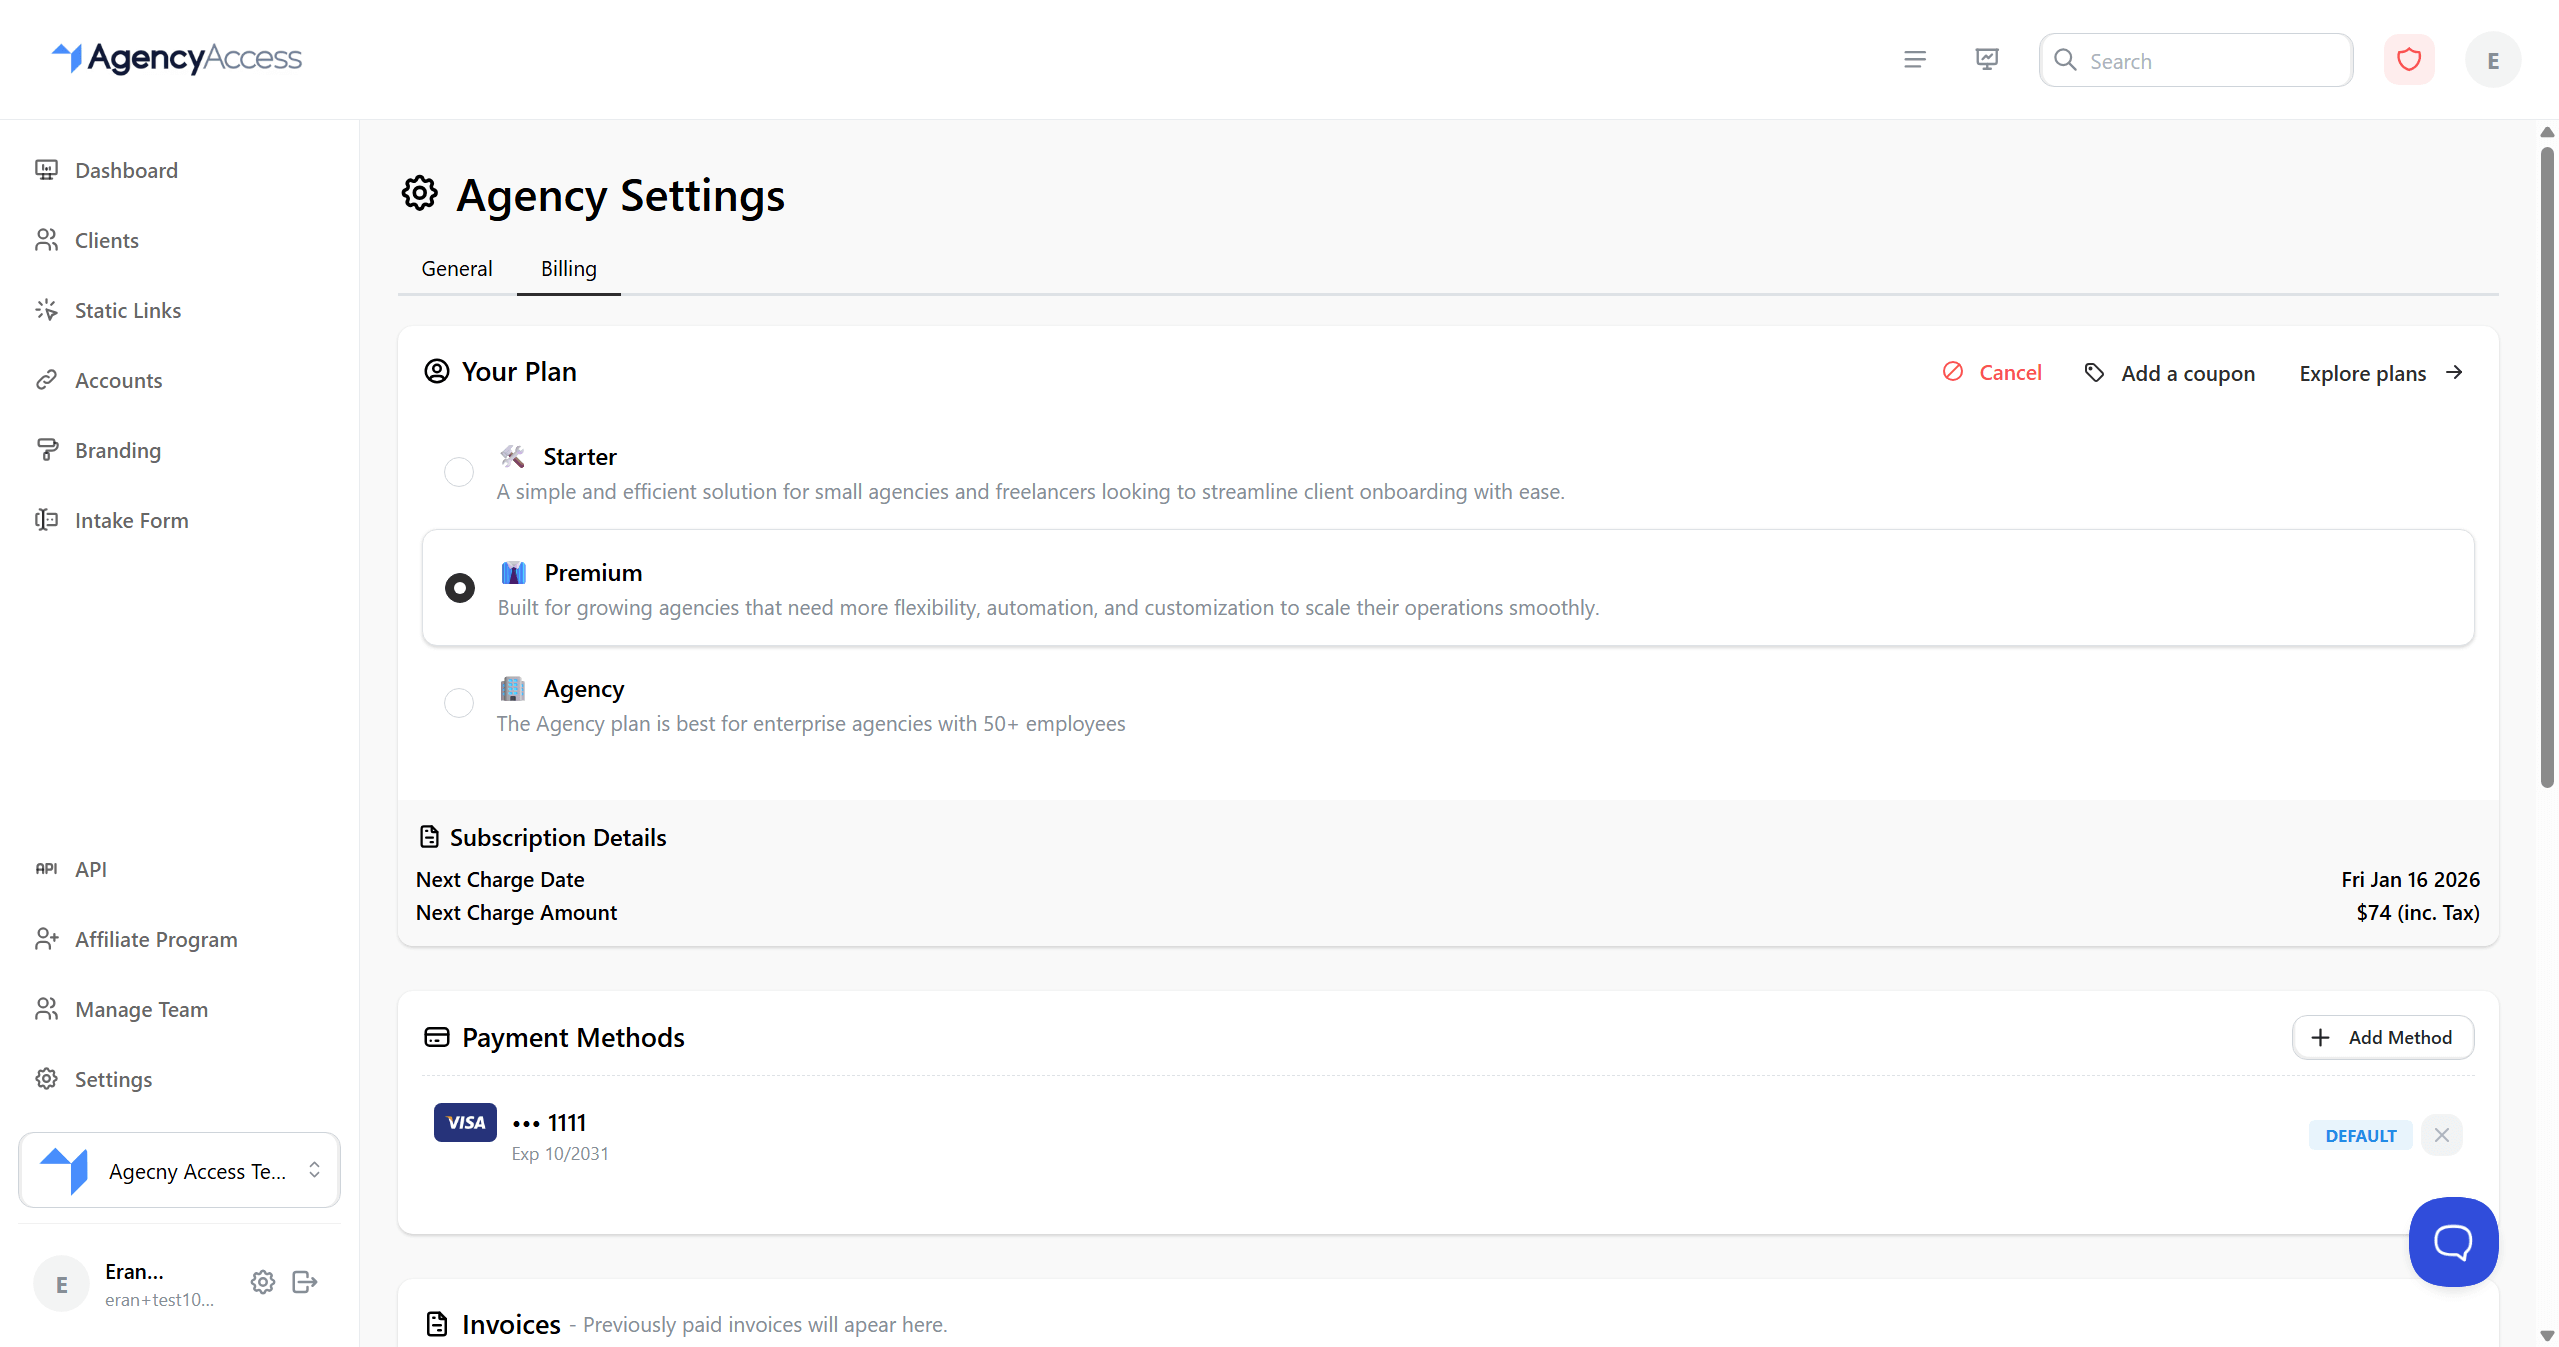
Billing lets you:
- View the current plan.
- Compare plan limits.
- Change plan or billing period.
- Add and manage payment methods.
- Add coupon codes.
- Add tax IDs.
- View invoices.
- Review account credit.
- Cancel or reactivate where available.
Plan limits shown in billing are the source of truth for monthly invites, access pages, connected accounts, branding, subdomains, Zapier, and related features.
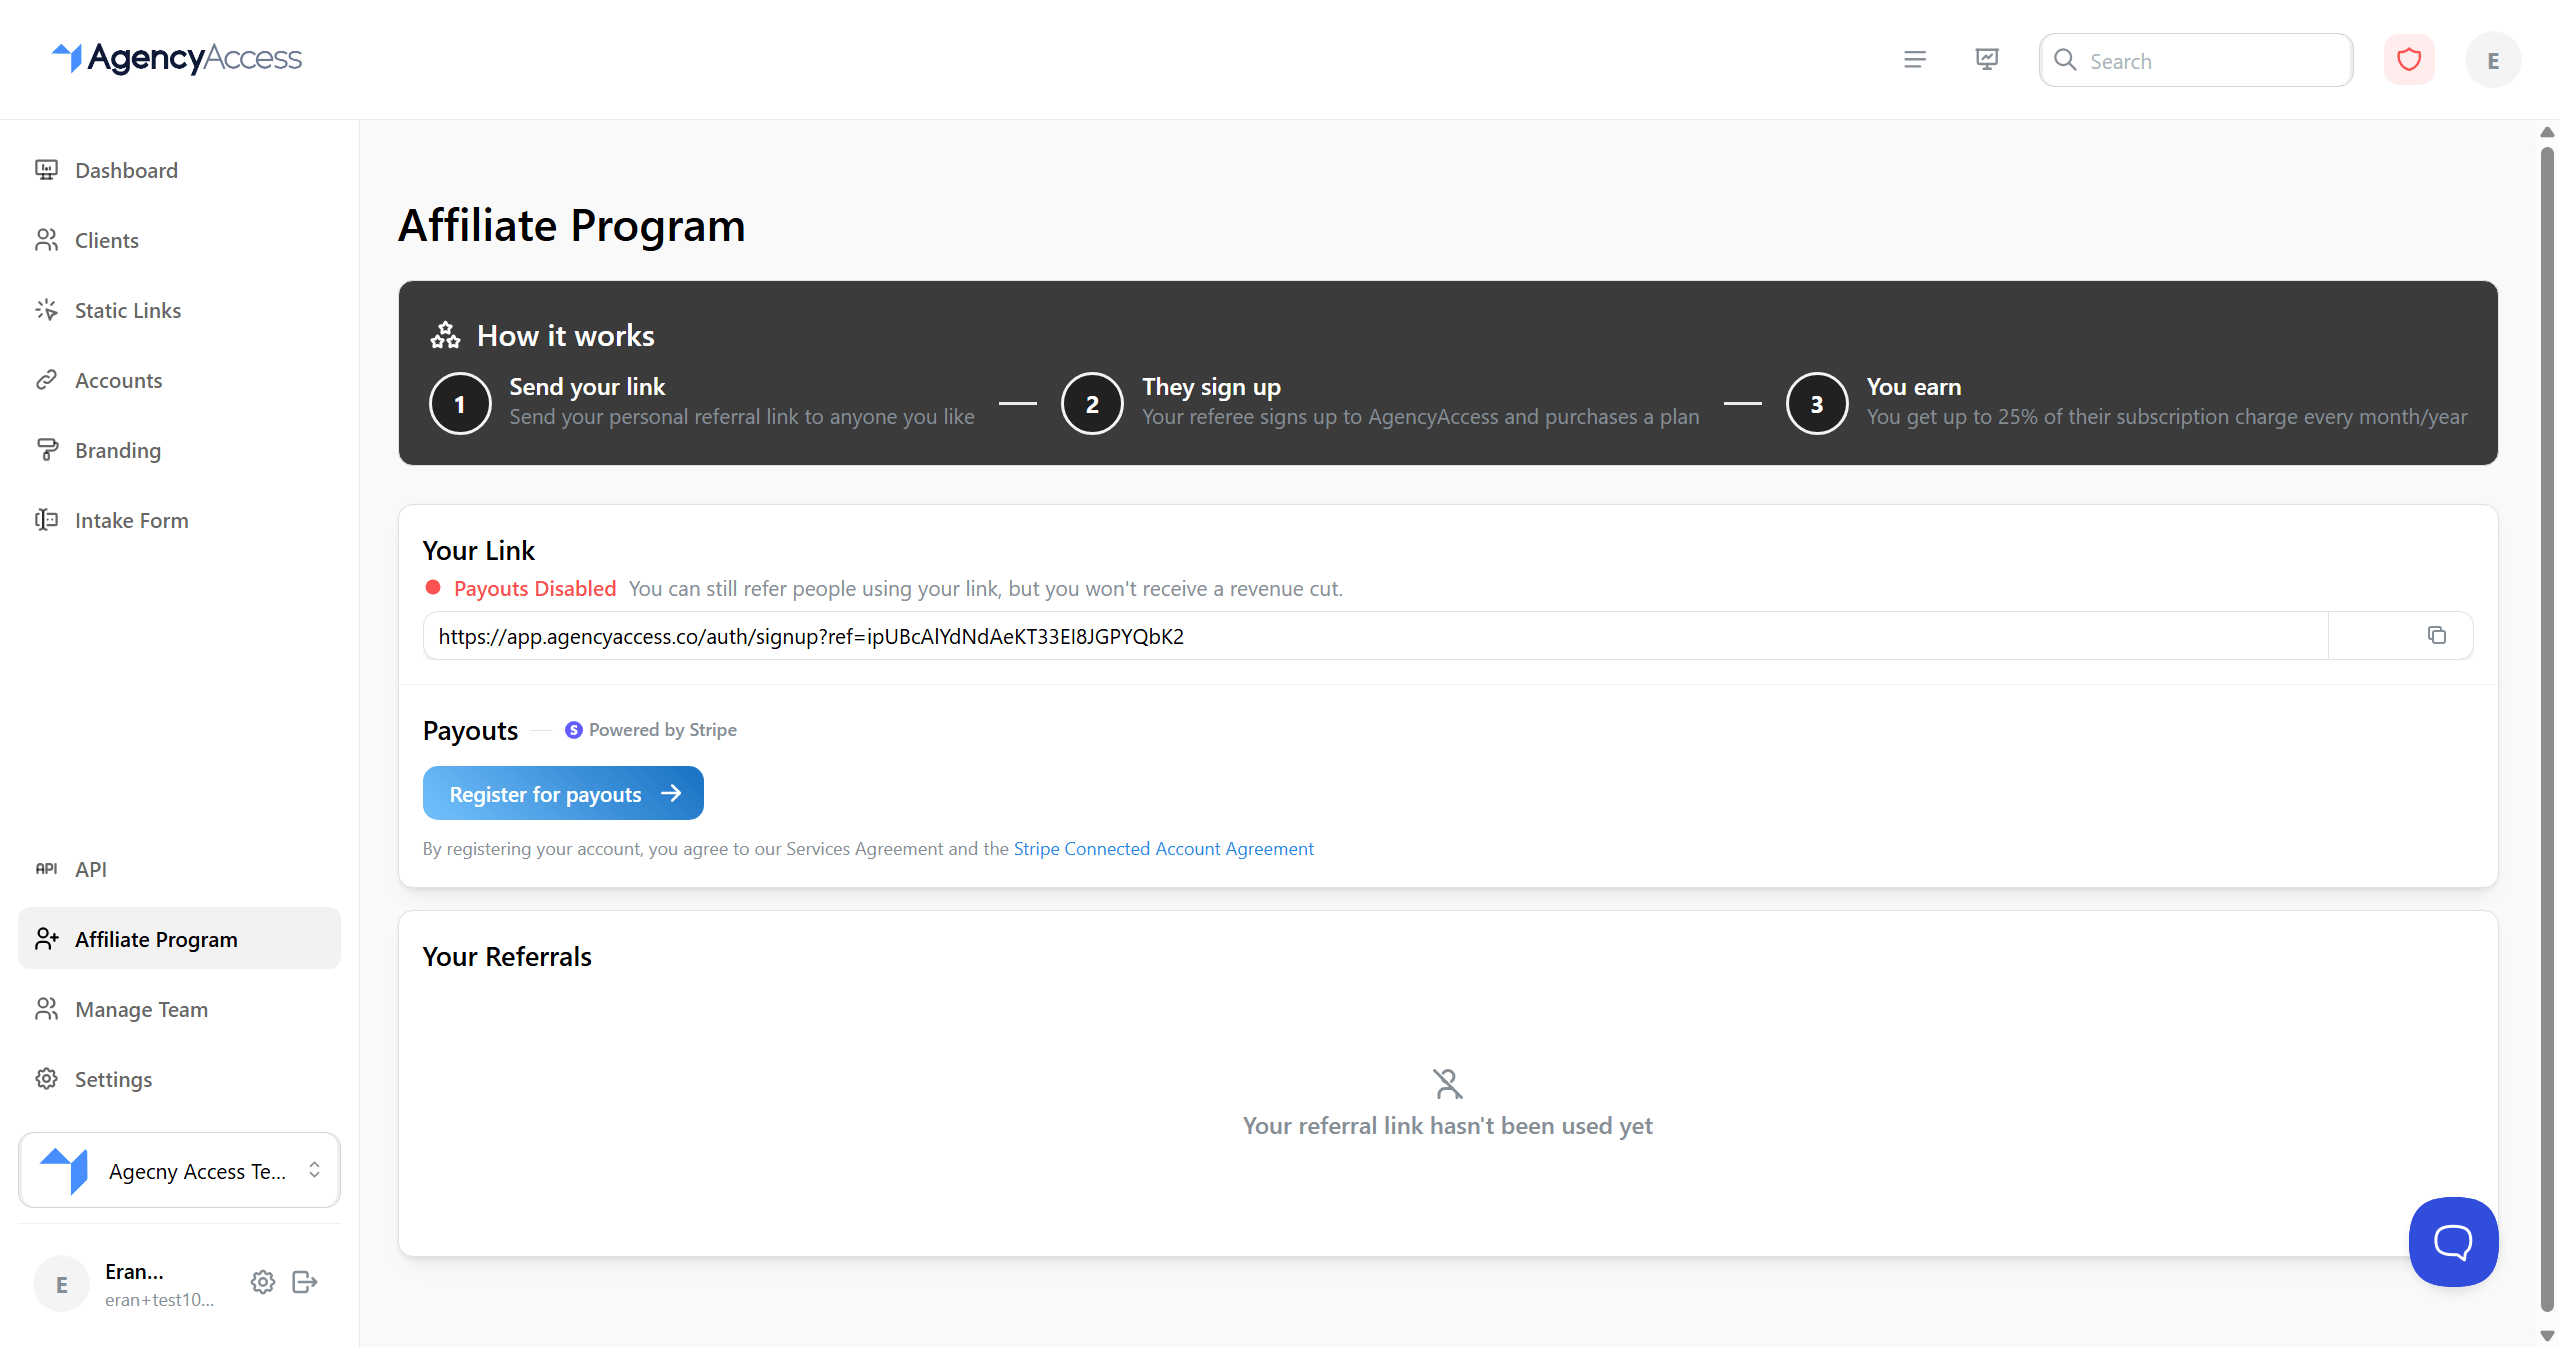
Affiliate Program
The account settings area includes affiliate/referral information where available. Use it to review referral setup, payout status, or partner onboarding details.
Profile Settings
Personal settings are separate from agency settings.
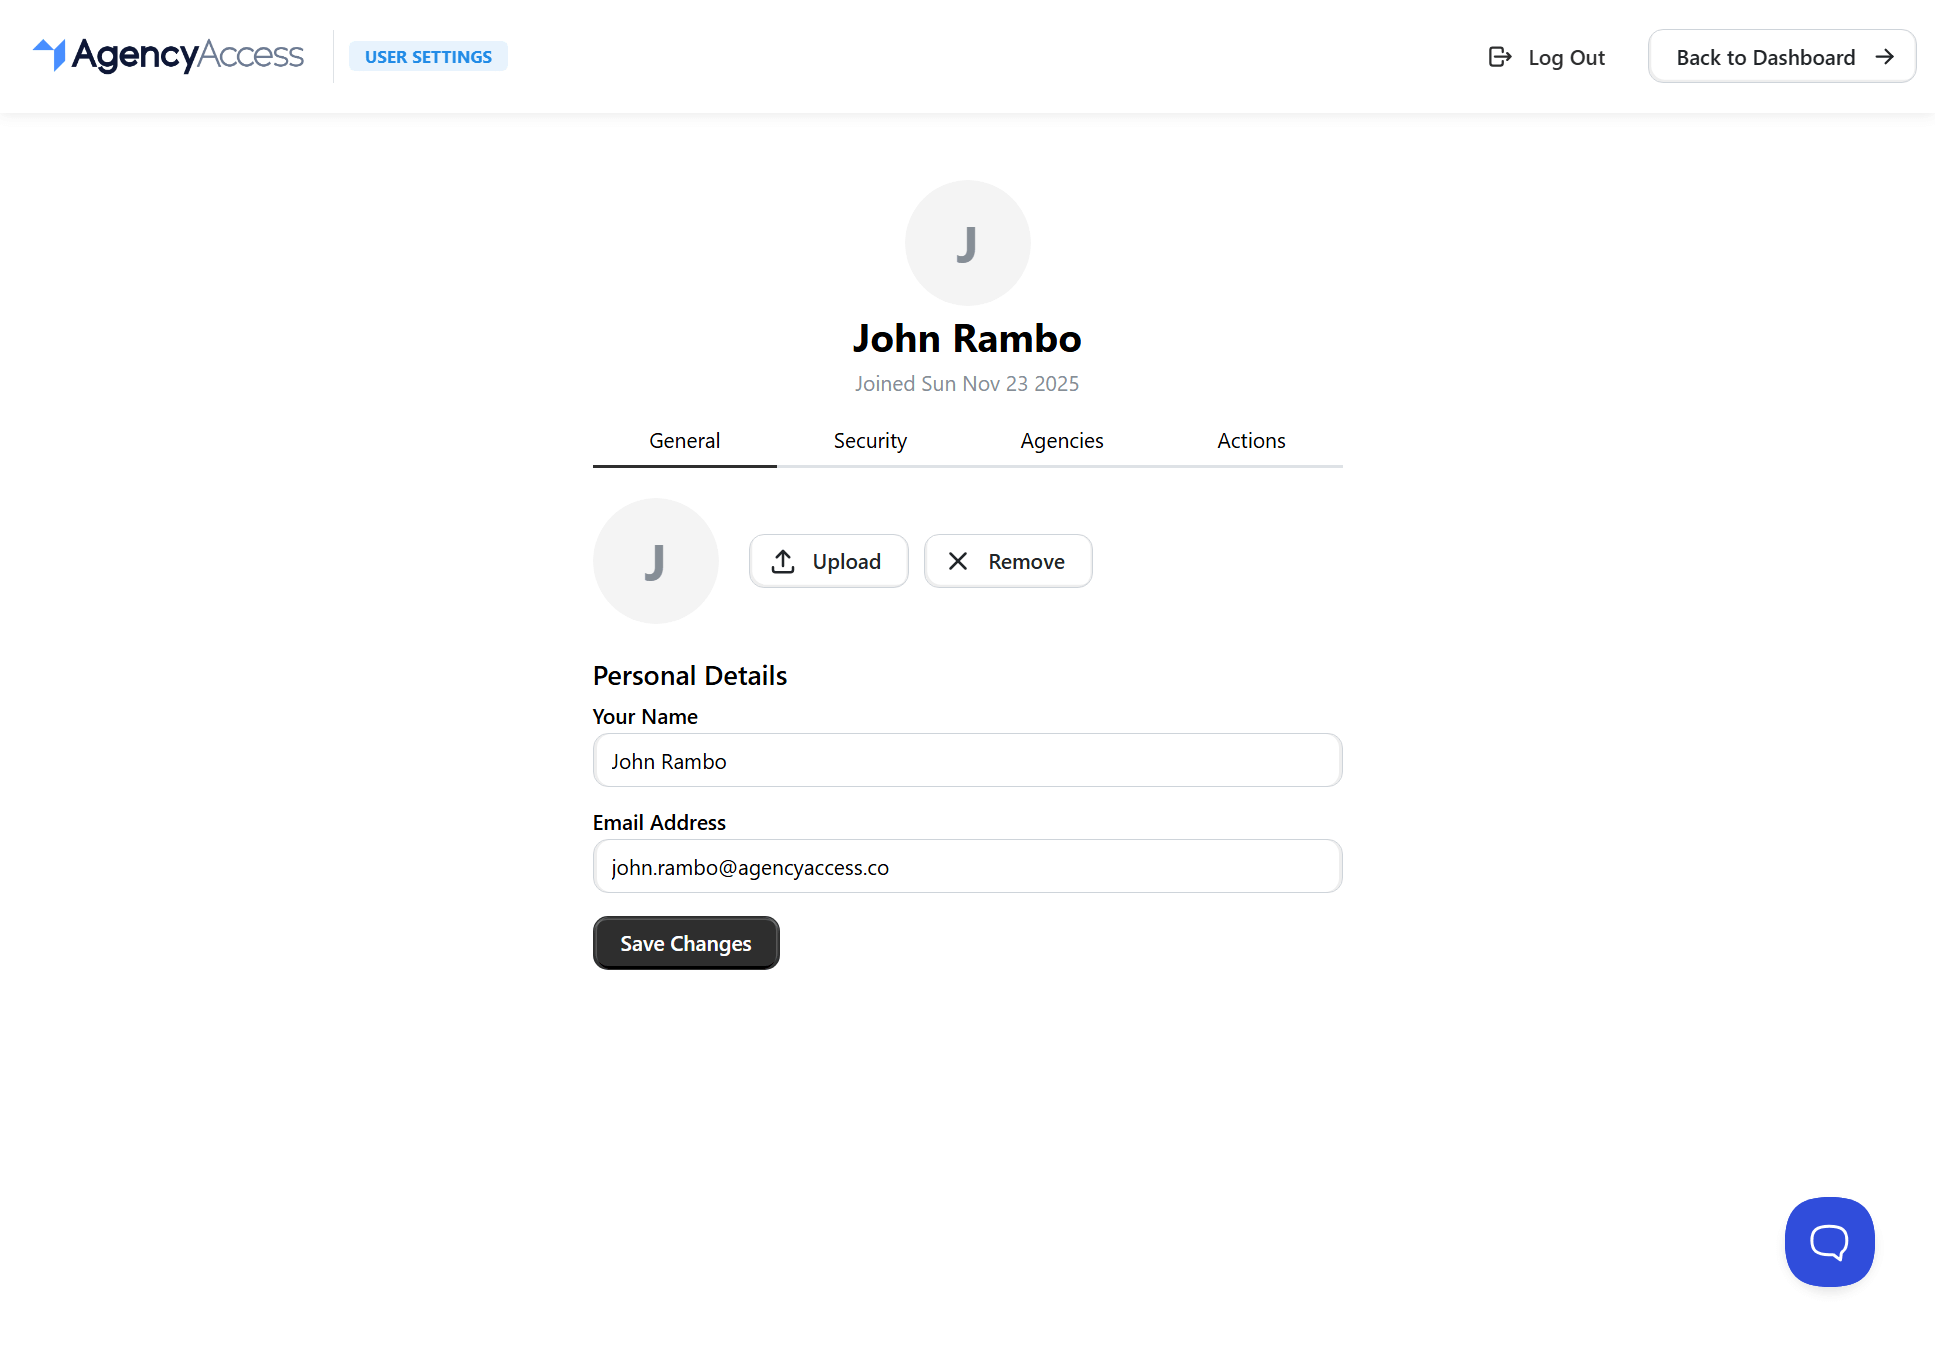
Open them from your profile/avatar menu. In personal settings, you can manage:
- Display name.
- Company name.
- Email address.
- Agencies you belong to.
Security and 2FA
Open personal settings from your profile/avatar menu, then go to Security.
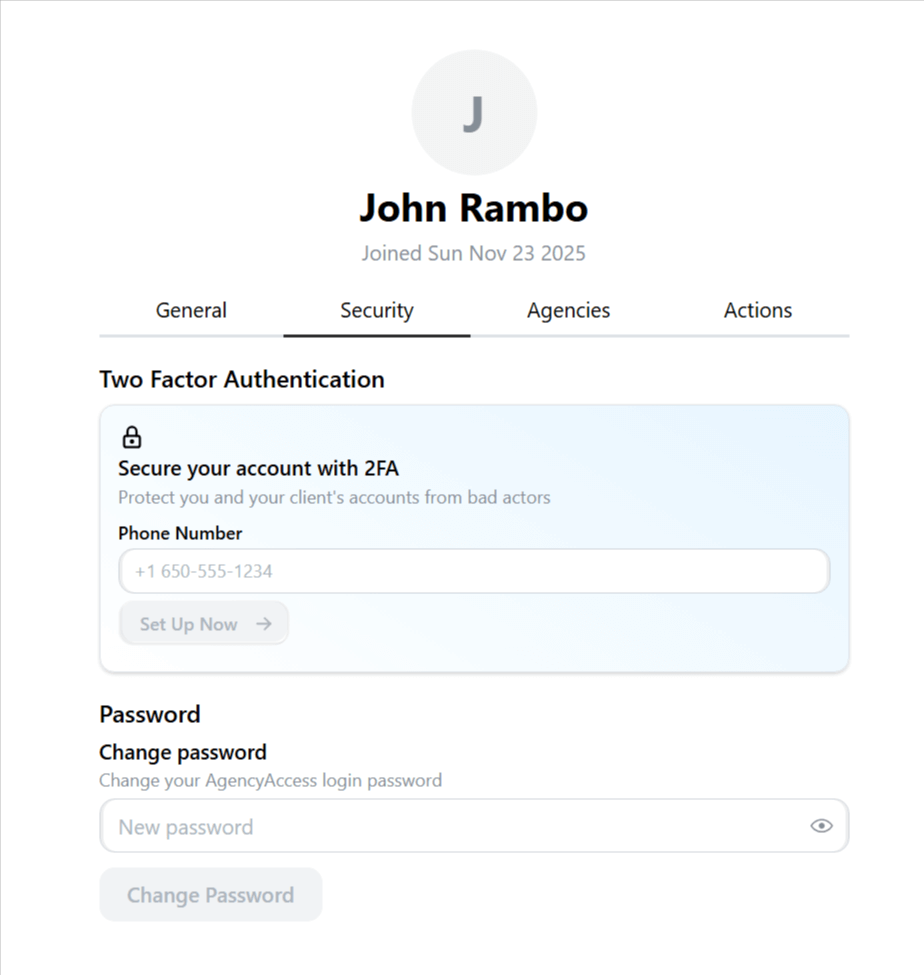
You can change your password and enable phone-based 2FA.
To enable 2FA:
- Verify your email address.
- Enter a phone number in international format.
- Continue through the reCAPTCHA and SMS verification flow.
- Enter the code sent to your phone.
AgencyAccess supports phone-based 2FA.
Data and Privacy
For account deletion or a data export, contact support. Account deletion is permanent, so export anything your team needs before requesting deletion.
Troubleshooting
Settings do not save
Check whether the section has a Save Changes button. Some controls save through their own action, while agency details require saving.
Billing is not accessible
Confirm you are the agency owner.
2FA cannot be enabled
Verify your email address first, then use a valid phone number with country code.
Notifications are not received
Check that the recipient is selected, the notification type is enabled, and the email is not in spam.